Showing posts with label soy sauce. Show all posts

Thursday, February 5, 2026

Filipino Chicken Bistek


Filipino Chicken Bistek
(Makes 6 to 8 servings)

3.5 to 4 lbs skinless boneless chicken thighs, cut into strips
2 medium onions, white and red, sliced
1/2 cup toyomansi
1/4 cup dark soy sauce
2 tbsp oyster sauce
1 to 2 tbsp sugar
4 packets of frozen calamansi juice or 4 tbsp fresh 
1 heaping tbsp of chopped garlic
1 generous pinch of ajinamoto/msg
1 tsp pepper
1 tbsp cornstarch

Combine everything except the onions and chicken. Taste and adjust marinade as needed then add the chicken. Marinate for at least 30 min to an hour.

Heat pan with a good amount of oil. 

Drain excess marinade from the chicken and add chicken to the pan. Cook the chicken until almost done. Add onions and cook for a couple of minutes. 

Add the excess marinade from the chicken and cook until the onions have just softened and the sauce is cooked through (about 10 min).

Tuesday, December 16, 2025

Japanese Chicken and Egg Rice Bowl


Oyakodon (Japanese Chicken and Egg Rice Bowl)
(Slightly adapted from Tiffy Cooks)

For the chicken:
4 boneless chicken thighs about 600 g total
1.5 tbsp soy sauce
1 tbsp vegetarian oyster sauce
½ tsp black pepper
2 tbsp cornstarch
1 small onion sliced
1 tbsp neutral oil like avocado or canola oil
Green onion to garnish

For the silky egg sauce:
4 eggs lightly beaten
¾ cup dashi chicken or vegetable stock
2 tbsp soy sauce
1 tbsp mirin Or ½ tbsp sugar

Season the Chicken: 
In a bowl, mix chicken thighs with soy sauce, vegetarian oyster sauce, and black pepper. Add cornstarch and mix well to evenly coat.

Pan-Fry: 
Heat oil in a pan over medium-high heat. Add the chicken and cook for 2–3 minutes per side, until golden and about 80% cooked through. Add sliced onion and sauté for 3–4 minutes until fragrant and slightly softened, letting it soak up all the savory chicken juices.

Add Sauce & Simmer: 
In a bowl, combine eggs, stock, soy sauce, and mirin. Turn the heat down to low then add sauce into the pan. Let everything simmer and cook for 4 -5 minutes, or until the eggs are just set and silky.

Serve: 
Spoon everything over a warm bowl of rice, making sure to get that glossy sauce on top. Serve with sautéed or steamed vegetables to complete the meal.

Sunday, September 29, 2019

hello old friend: korean bbq sandwich


My poor food blog, how you've been neglected.
That's okay, sometimes life gets in the way and hobbies go to the wayside. However, one thing that I really can't stop doing is cooking. That, or make sandwiches.

Speaking of sandwiches, my favorite hot sandwich would have to be my Korean BBQ. A lot of trial and error went into them but now I have it exactly the way I want it. It's got lots of different textures, sweet, salty, and definitely tasty!

My favorite thing about it is getting to use my Mom's kimchee recipe. It's not traditional in any sense, but it's a mild kimchee without any fishiness...perfect for picky eaters who don't like that pungent taste. ^_^

---- o o o o ----
Bulgogi Beef Sandwich with Crispy Leeks and Mom's Kimchi
(adapted from Tasty)

For the Bulgogi:
3 tbsp bottled garlic
3 tbsp low sodium soy sauce
2 tbsp Healthy Boy Brand sweet black soy sauce
2 tbsp sugar
1 tbsp honey
2 tbsp fresh squeezed juice from an Asian pear or sweet apple
1 tbsp Japanese mirin
1 tbsp sesame oil
5 to 6 green onions, finely chopped (including white part)
1 tsp pepper
1/2 tsp minced ginger
2 to 3 lbs extra thin carne picada or stir-fry beef

Mix marinade together until sugar and honey are dissolved/distributed. Add beef and marinate overnight or up to 2 days. Cook over medium high/high heat on an iron skillet. Serve immediately.

Mom's Kimchee:
4 cups Napa cabbage, chopped into 1-inch pieces
1 cup matchstick carrots 
1/4 cup sliced green onions, green parts only
1 to 1.5 tsp kosher salt
1/2 bottle Lee Kum Kee chili garlic sauce
1/2 tsp sugar
1/2 cup matchstick carrots

Blanche cabbage and carrots in boiling water for 30 seconds. Drain well then toss with salt. Let stand in a strainer for 1.5 to 2 hours until excess liquid has drained. Transfer to a large bowl. Add remaining ingredients and toss, seasoning with additional salt as needed. Refrigerate, keeping up to 2 weeks.

Seasoned Japanese-Style Mayo:
1/2 cup Duke's mayonnaise
1 to 2 tbsp mirin
1 tbsp apple cider vinegar

Whisk together and adjust proportions as needed, to taste.

Crispy Fried Leeks:
1 leek, thinly sliced to 2-inch slivers
vegetable oil

Heat enough oil to fry leeks. Fry until leeks are golden brown around the edges. Transfer to paper towels to drain excess oil.

Bulgogi Sandwiches:
bulgogi beef
kimchee
crispy leeks
shredded romaine lettuce
seasoned Japanese-style mayo
toasted French rolls

To assemble sandwiches, spread some Mayo on the rolls. Add a good portion of bulgogi on one side of the bun, shredded lettuce on the other. Drizzle with mayo, top with crispy leeks, then drizzle with mayo again to taste, then serve.

Tuesday, January 5, 2016

taste it and make it: bulgogi sandwich!


When the hubby and I were still in Guam, there were a few eateries we found that got into our usual meal rotation. Our top three were definitely Katre's Bistro, Pika's Cafe, and surprisingly, Dr. Kabob (a Greek fast food joint). Pika's Cafe, though, would probably be the best "farm-to-table" restaurant the island has. Their moto and menu revolved around the phrase, "Buy local, eat local, support local!".

With that, Pika's Cafe also had a revolving seasonal special and a bunch of unique items on their standard menu. The hubby's favorite was definitely their Korean BBQ Sandwich. In the past month, I've heard the hubby lament several times on the loss of acess to that particular sandwich. Every time we passed the Asian isle on the grocery store, he would comment with "I miss Pika's" . . . which meant the sandwich, of course, lol.

I figured I'd give him a surprise!

Enter, my version of the Korean BBQ Sandwich! Since he was missing the sandwich so much, I thought that I would try and replicate the sandwich as close as I could. I knew that it had bulgogi marinated beef, with kimchi-style pickled vegetables, and cucumbers. It also had a chili mayonnaise.

Knowing was half the battle . . . It's the execution that was the problem. In mine, I decided to sub the beef with chicken. It was lighter than beef (I wanted to get away from heavy foods for the time being) and I thought it would be easier to marinate. Also, I didn't have any beef in the fridge anyway which was another big factor, lol.
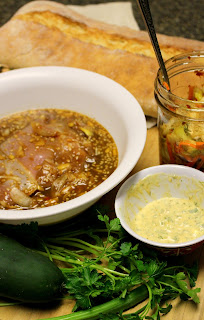

For the marinade, I decided to go with this recipe but adapted it slightly to include minced apples and sliced onions. From what I read on the web, one of the traditional ingredients to add was either Korean pears or kiwi. Well, since I had neither, I subbed with Golden Delicious apples instead (since that was what I had in the pantry). After making the chicken, I ended up with quite a bit of marinade left. I decided to cook it down and made it into a sauce for the chicken afterwards.

The kimchi recipe was something that I was pleasantly surprised to find. I thought that I would have to put my ingenuity to the test, but apparently someone had already used theirs. I love that this uses regular cabbage and ingredients I already had on hand ("emergency kimchi" indeed!). In traditional kimchi, a coarse ground red pepper called gochugaru is commonly used. However, I've also seen a few recipes call for a fermented chili paste called gochujang to be used instead of the gochugaru. Well, I decided to go with the flavor notes of the gochujang since this would be quickly pickled to be used the next day. That way, I would have the taste of a long fermented kimchi without actually waiting. :)

During the taste testing, I found that this kimchi had a lot of heat to it. So, I nixed the chili mayo that I was originally going to make. Instead, I decided to use some of the leftover chimichurri, mixed with some ketchup and mayo, to make an aioli out of that (secret sauce, baby!). It has a lot of acidity so I thought it would help imitate the "pickled" part of the sandwich. With the ciabatta, kimchi, chicken bulgogi, aioli, and cucumbers all ready to go, my sandwich was ready to be assembled!

This turned out better than I hoped! It had the same savory, sweet, and spicy flavors the Pika's sandwich had. The only drawback was that the sandwich was messy to eat. The chicken made the whole thing a little bulky and the "take-and-bake" ciabatta bread I bought was a tad bit too chewy. The sauce made from the marinade also made this messy, but I think it wouldn't be the same without it. And the kimchi? Everywhere.

Next time, to reduce the messy factor, I'll get a softer ciabatta and cut the bread so it'll envelope the fillings more. Also, I'll toss the chicken in the sauce first and shake off any excess. That way, I'll still get some of the sauce on the chicken. But man, this was one of my favorite experiments!! Oh, by the way, the hubby LOVED the sandwich. Although it wasn't Pika's Cafe's Korean BBQ Sandwich, he thought it was a damn good substitute. :D Now, back to the drawing board . . .

---- o o o o ----
 

Korean Chicken Bulgogi
(slightly adapted from Meg's Everyday Indulgence)

2 to 3 pcs boneless chicken thighs

For the Marinade:
1/2 a Korean pear, apple, or kiwi, minced
1/2 a small onion, thinly sliced
3 tbsp soy sauce
1 tbsp lemon juice
1 tbsp brown sugar
1 tbsp honey
1 tbsp rice wine, mirin, or cream sherry
1 tbsp sweet chili sauce
1 tbsp sesame oil
1 tbsp minced garlic
1 tbsp white vinegar
1 tsp grated ginger
1 tsp toasted sesame seeds
1/4 tsp black pepper

 
Mix the marinade ingredients in a bowl until the sugar has dissolved. Add chicken and toss well to coat. Cover and marinate for a minimum of 30 minutes up to overnight in the fridge.

To cook, preheat a skillet over medium high heat. Add the chicken, reserving the marinade. Cook until chicken is cooked through and slightly caramelized, taking care not to burn. If needed, add the reserved marinade by tablespoon when the pan gets dry. Garnish with sliced scallions and toasted sesame seeds. Serve with a side of kimchee.

---- o o o o ----
 

Quick Emergency Kimchi
(slightly adapted from Maangchi)

2 lbs green cabbage, cut into thin 2-inch strips
1/2 a small onion, thinly sliced
1 cup cold water
1/4 cup kosher salt
1/3 cup hot pepper flakes
1/4 cup fish sauce
1/4 cup minced garlic
1/3 cup (3 to 4 stalks) chopped green onion
1/4 cup julienned carrots
1 tbsp sugar
1 tbsp soy sauce
1 tsp ginger

 
Place cabbage in a large bowl and add cold water and kosher salt. Mix well with hands to properly salt cabbage. Set aside for 10 minutes. Make a paste with the remaining ingredients.

After the cabbage has soaked, wash and rinse the salted cabbage in cold water a couple of times then drain well. Return the cabbage to the bowl and mix the paste into the cabbage thoroughly.

Put the finished kimchi into a container, jar, or plastic bag. Press the top of the kimchi down with your hands to protect from exposure to too much air.

Refrigerate for at least 30 minutes before serving or eat right away like a salad. Alternately, keep at room temperature a few days to ferment if desired.

Sunday, November 24, 2013

at-home take-out.


yesterday was a stay-at-home kind of day. after spending the weekend with the parents, i just wanted to relax and do nothing. unfortunately, we didn't have any ready-made food at the house so i decided to delve into my cook books and see if i could make anything tasty.

this recipe caught my eye.

it looked quick and easy and i had mostly all the ingredients. some substitutions had to be made as i didn't have the chili paste but surprisingly the ketchup, chili flake, and garlic paste method didn't turn out too bad. i had to fiddle with the recipe a little, though, because it was initially kind of bland when i finished making it. after tinkering around with it for a minute, i ended up with something that's a little bit more flavorful with the added chinese five-spice blend and help from boosting the spices and seasonings. also, since i didn't have any rice, i decided to use the rest of my squid ink pasta to make it a noodle stir-fry. yay for add-ins! :D


Stir-Fried Ginger Shrimp Noodles
(barely adapted from Cooking Light)

1 pound medium shrimp, peeled and deveined
2 teaspoon chopped peeled fresh ginger
1/2 teaspoon salt, plus more for pasta
Dash of white pepper
1/2 cup water
1 tablespoon mirin (sweet rice wine)
2 teaspoons low-sodium soy sauce
2 teaspoons cornstarch
1 teaspoon sugar
1 1/2 teaspoon dark sesame oil
1/2 teaspoon chile paste with garlic (such as sambal oelek or make a substitute)
1 tablespoon canola oil, divided plus more for pasta
1 cup thinly vertically sliced onion
4 garlic cloves, minced
1 cup diagonally cut celery
1/4 tsp chinese five-spice blend (or make your own)
4 portions squid ink spaghetti
sliced green onions for garnish

1. In a large pot, heat salted water to boiling (water should taste like the sea). Add canola oil to the water to prevent pasta from sticking then add the pasta. Let cook until al dente, drain, then set aside.

2. Place shrimp in a medium bowl. Sprinkle with ginger, salt, and pepper; toss well. Let stand 5 minutes.

3. Combine 1/2 cup water and next 6 ingredients (through chile paste) in a small bowl, stirring with a whisk.

4. Heat 1 teaspoon canola oil in a large nonstick skillet over medium-high heat. Add shrimp mixture to pan; stir-fry 2 minutes. Remove shrimp mixture from pan; set aside. Wipe pan dry with a paper towel. Heat remaining 2 teaspoons canola oil in pan over medium-high heat. Add onion and garlic; stir-fry 1 minute. Add celery; stir-fry 1 minute. Return shrimp mixture to pan; stir-fry 1 minute or until shrimp are done.

5. Add water mixture to pan along with chinese five spice. Bring to a boil; cook 1 minute or until thick, stirring constantly. Add the pasta to the pan and stir to coat. Season with salt and pepper to taste. Remove from heat and top with sliced green onions. Serve immediately.

Makes four servings.

Wednesday, October 9, 2013

roasting for the rain.

today was a cold day. the rain fell in hard little drops and the crispness of the air signaled the start of fall in our normally temperate city. what better way to welcome the season than a nice roasted game hen? :)

this recipe for the cornish game hen was really killer. savoury and tasty...the kind that you just want to keep on eating until you couldn't eat anymore. the flavor of the garlic and soy suace with a light lemon finish really stayed in your mouth. we ended up doubling the recipe as the hens we got were on the smaller side.

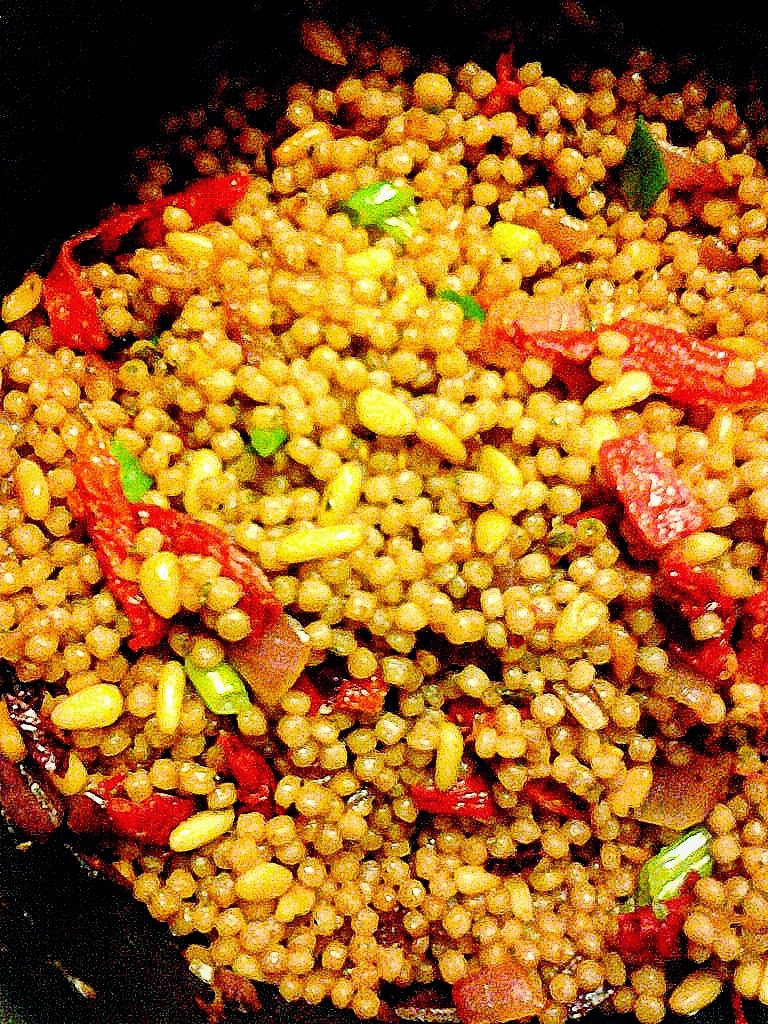
my sister and i paired it with tarragon glazed carrots and a coucous to balance everything out. the sides we chose were a great accompaniment to the hens and everything just worked together to create a perfect fall meal. next time i do the couscous though, i'd make it a tad more tomato-y and add less butter. we also adjusted the recipes to serve two people.

Cornish Game Hens with Lemon and Garlic
(from What’s Cooking America)

1 Cornish Game Hen*
Coarse sea salt and freshly-ground black pepper
1/4 cup low-sodium soy sauce
3 to 4 minced garlic cloves
Juice from 1 to 2 lemons (to taste) (we only had bottled, so guestimated)
2 tablespoons butter

* Have your meat cutter cut one (1) Cornish game hen in half. Remove inside bag from each half prior to preparing.

Place non-stick aluminum foil on baking sheet. Salt and pepper both sides of the Cornish game hen.

In a microwave-safe bowl, combine soy sauce, garlic, lemon juice, and butter. Heat in microwave until butter has melted and you can smell the garlic. Carefully remove from microwave.

Baste both hen halves, on each side, with the prepared marinade and place on the prepared baking sheet. NOTE: The hens can now go back into the refrigerator until cooking time. Remove 1 hour before cooking to allow hens to come to room temperature.

Heat the broiler of your oven and move oven rack up to the second notch below the broiler element. Broil hens on one side until you see the marinade start to bubble and the skin starting to brown; baste again, turns hens over, baste, and broil until starting to brown. Using oven mitts, remove Cornish game hens from the oven.

Turn the oven to 375 degrees F. Move oven rack down to roasting position.

Place the partially cooked Cornish game hens back in the oven (cut side down), and baste again. Roast until the hens, are done, or until a thermometer registers an internal temperature of 165 degrees F. (juices will run clear when cut with the tip of a knife). Baste frequently with accumulating juices.

Remove from oven and baste again with the remaining juices that have browned nicely on the foil. Cover cooked Cornish game hens loosely with a piece of aluminum foil for about 10 minutes. Baste again on both sides, and place on individual serving plates.


Herb and Tomato Couscous
(from Honest Fare)

About 10-12 sun dried or roasted tomatoes (used sun-dried tomatoes in olive oil)
Olive oil
Handful of fresh sage and oregano (used dried and eyeballed it, maybe 2 tsp each?)
Salt
Black Pepper
1 small clove garlic (trippled this and used roasted garlic instead)
1/4 red onion (doubled this cuz we love onions :D)
2 shallots (i subbed chopped scallions and added it in the end)
1 1/2 cups dry couscous (we used boxed whole wheat couscous)
1/4 cup pine nuts (feta crumbles as sub.)

1. Dice up herbs, tomatoes, shallots, red onion and garlic (set a small amount of fresh herbs aside for later). Saute it all on medium heat in about 4 tablespoons of olive oil until onions are tender. Add a teaspoon of salt and some cracked black pepper. Keep partially covered for about half the time so all the juice doesn’t evaporate.

2. Prepare couscous: you’ll need 1 ½ cup dry couscous per 2 cups of water. When water boils, add 1 tablespoon of olive oil, ½ a teaspoon of salt and the grain. Remove pot from burner right away. Keep covered for 5 minutes. Fluff when fully absorbed. If you use a box, just follow those directions. (followed box directions)

3. Toast pine nuts: cover the bottom of a pan evenly with pine nuts (no oil is required). Cook on medium low heat (no higher!) and keep tossing them around until they’re browned on both sides. Don’t take your eyes off them too long or they’ll burn…and that sucks.

4. Add herb and tomato mix to the couscous. Crack a little extra pepper and hit it with another dash of salt and/or olive oil if you like. Toss REALLY well to remove all clumps. Top with pine nuts or feta cheese and the fresh herbs you set aside in the beginning. Toss again and serve. (next time, i would probably put the herbs and use the oil from the tomatoes together in the pot of couscous while it's cooking. this would pobably make the dish a little bit more flavorful.)


Tarragon Glazed Carrots
(from A Teaspoon of Happiness)

8 carrots, sliced
2 tablespoons butter or margarine
1 clove garlic, minced
1 tablespoon finely chopped fresh tarragon (used dried, about 1-2 tsp)
1/2 teaspoon salt
1/4 teaspoon pepper

1. In a large saucepan or skillet, cover carrots with water and bring to boil - keep pot covered.

2. Reduce heat and continue simmering for about 10 - 15 more minutes or until carrots are tender.

3. Drain water from the pot.

4. Stir in the remaining ingredients and allow to cook for 2 more minutes or until butter is melted.

Tuesday, November 6, 2012

big bang and dinner.


just a quick post. had my sister over last night and made some delicious food. For the main we made some broiled chicken and for the sides we did asparagus with leeks and bacon with caramelized onion and goat cheese mashed potatoes. Couple that with a four hour marathon of big bang theory and you got yourself a good night! XD life is good. :)

 
Easy Garlic Broiled Chicken
(from All Recipes)

1/2 cup butter
3 tbsp sminced garlic
3 tbsp soy sauce
1/4 tsp black pepper
1 tbsp dried parsley
6 boneless chicken thighs, with skin
dried parsley, to taste

1. Preheat the oven broiler. Lightly grease a baking pan.

2. In a microwave safe bowl, mix the butter, garlic, soy sauce, pepper, and parsley. Cook 2 minutes on High in the microwave, or until butter is melted.

3. Arrange chicken on the baking pan, and coat with the butter mixture, reserving some of the mixture for basting.

4. Broil chicken 20 minutes in the preheated oven, until juices run clear, turning occasionally and basting with remaining butter mixture. Sprinkle with parsley to serve.


Absurdly Addictive Asparagus
(from Food52)

4 ounces pancetta, cut into 3/8 inch to 1/4 inch dice
1 tablespoon butter
1 pound asparagus, woody ends trimmed and sliced into 2 inch pieces on the bias
1 1/4 cup leek, thinly sliced crosswise (white and pale green parts only)
2 cloves garlic, minced
Zest of one lemon
1 teaspoon orange zest
2 tablespoons toasted pine nuts
1-2 tablespoon Italian parsley, chopped
Salt and freshly ground pepper to taste

1. In a large non-stick pan, sauté pancetta, stirring frequently, over medium heat, until crisp and lightly golden.

2. Add 1 tablespoon of butter to pan. Add asparagus pieces and leek and sauté until asparagus is tender crisp, about 3-4 minutes.

3. Add garlic, lemon and orange zest, toasted pine nuts and parsley and sauté for about 1 minute, until fragrant. Season to taste with freshly ground pepper and salt and serve immediately.


Mashed Potatoes with Caramelized Onions and Goat Cheese
(from Food52)

4 tablespoons unsalted butter, divided use
1 tablespoon olive oil
1.5 pounds yellow onions (approximately 2 large onions), thinly sliced
Kosher salt
1/4 teaspoon sugar
3 pounds Russet potatoes, peeled and cut into 1-inch pieces
1.5 cups half and half
1 clove garlic, smashed
1 bay leaf
3 ounces goat cheese
Black pepper

1. To make the caramelized onions, heat 2 tablespoons of butter and the olive oil in a large sauté pan over medium heat. Add the sliced onions and stir them to coat with the fat. Add 1/4 teaspoon salt and the sugar and cook, stirring frequently, until onions are golden brown and caramelized, about 30-40 minutes. If the onions get too dry, add a small amount of water to deglaze the pan. Set aside.

2. Place the potatoes in a large pot of cold, salted water. Bring to a boil and cook until fork tender.

3. While the potatoes are cooking, heat the half and half, garlic, bay leaf, and remaining 2 tablespoons of butter in a small saucepan over medium heat.

4. Drain the potatoes and return them to the hot, dry pot. Stir them over low heat for 2 minutes until they are dry. Pass the potatoes through a ricer into a large bowl. Gently stir in the hot cream mixture a little at a time until the potatoes are smooth and creamy (discard the garlic and bay leaf). You may not need to use all of the liquid. Set aside a small amount of the caramelized onions for garnish and stir the remaining onions into the mashed potatoes. Crumble the goat cheese into the potatoes and stir to combine well. Season with salt and black pepper to taste. (deviated from here. i just took out the bay leaf and mashed everything together, stired in 3/4 of the caramelized onions and all of the goat cheese, seasoned it, and garnished it with the rest of the onions while in the pot.)

5. Spoon the mashed potatoes into a serving bowl and garnish with the remaining caramelized onions. Serve hot.

Saturday, February 25, 2012

poulet a l'orange...kind of.


well, i intentionally wanted to make gordon ramsay's sticky lemon chicken but i didn't have lemon....i had navel oranges. soooo, i did an orange chicken instead and made a side of sesame asparagus to go along with it. :D

when i go to bevmo to go shopping, i head straight to the minis and decide what liquor i can use in my cooking. i had actually bought a cointreau mini, which is an orange liqueur, a week ago and thought, great! this will go nicely with the recipe i was supposed to follow. it basically remained the same except i took out the water and subbed oj, and lemon juice for lots of orange zest, and cut the thyme in half. i let that sit for ten minutes while i prepped and cooked the chicken.


after that, it was making the glaze syrupy and tossing the chicken in it then making the asparagus side. so what did it taste like? like panda express without the breading but ten times better! XD i'm looking forward to making this again and maybe playing with different citruses and fruits. and i was surprised how well the thyme worked with the oranges...it would probably have been better if the thyme was fresh: the little bitty dry leaves slightly poked you in the mouth when you chewed, lol. also, one thing i think was missing was some sort of starch...maybe a rice dish? i don't know. but it was still pretty awesome. thank you mr. ramsay for this wonderful base recipe! now, all i have to do is see if i can make his other dishes! :D


Sticky Lemon Chicken
(from Gordon Ramsey and Food.com)

1 lb chicken leg/thighs, about 8-10
salt and pepper
4 tbsp olive oil
2 tbsp soy sauce
3 to 4 tbsp honey
1 head garlic, each clove sliced in half
1 whole lemon, Sliced
1/4 to 1/3 cup water
1 tbsp thyme
1/4 cup fresh parsley or 2 tbsp dried parsley

1 .In a large skillet pan, add the oil to Med/High Heat. Season the chicken well with salt and pepper. Add the chicken to the skillet and cook for about 5-6 minutes, turning each piece.

2. Add the garlic cloves, soy sauce, and honey to the pan, making sure to get all the chicken in the sauces. Coninue to cook for a 5 minutes.

3. Add the water and lay the slices of lemon on top of the chicken in the pan. Put a lid on the pan and continue to cook for about 10-15 minutes.

4. Season the chicken with thyme and parlsey. Continue to cook until the chicken is cooked through and no longer pink.


Sesame Asparagus
(from Delicious Dishes)

2 tablespoons soy sauce
2 teaspoons sugar
2 tablespoons oriental sesame oil
2 large garlic cloves, chopped
2 pounds asparagus, ends trimmed, cut on diagonal into 2-9nch-long pieces
4 teaspoons sesame seeds

Stir soy sauce and sugar in small bowl until sugar dissolves. Heat oil in heavy large skillet. Add garlic and stir 15 seconds. Add asparagus and stir-fry until crisp-tender, about 4 minutes. Add soy mixture and toss until asparagus is coated, about 1 minute longer. Season with salt and pepper. Transfer to bowl; sprinkle with sesame seeds and serve.

Serves 4-6