Monday, June 20, 2022
Spicy Honey Glazed Carrots
Monday, April 18, 2016
tagine, without the pot.

I love buying kitchen gadgets . . . especially if it's something that I'll particularly find useful. Sometimes, I buy them because they're cute or pretty. My latest splurge was at World Market where I got myself a nice-sized tagine!
I've been itching to use it and finally found a couple of recipes that I wanted to try. So, I got everything that I needed and started to cook. Unfortunately, I never used the tagine. Turns out, before you use a tagine, the bottom portion needs to soak overnight or else it'll crack. Not only that, but apparently I also needed a "heat diffuser" so that it'll protect the clay pot from excess heat. Who knew that clay pots were so finicky??
Luckily for me, I had a heavy-bottomed pot to use as an alternative.
Despite not using the tagine, this dish actually turned out pretty well! I used this and this as guides and went from there. And since I didn't have some of the ingredients listed, I made do with what I did have in my fridge/pantry: Moroccan oil-cured olives, saffron water, giant golden raisins, and plain lemons.
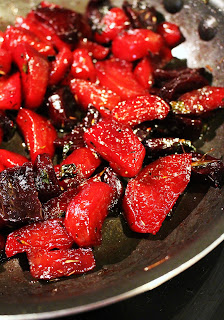
For the side, I decided to make some roasted beets. It's a little weird since I've never come across any Moroccan dishes that uses beets as a side dish, but it was either use them or let them go bad. Thankfully, they paired surprisingly well with the lemony tagine. I also served this with some saffron rice since the hubby isn't too keen on couscous.
So, what's the verdict? Two thumbs up from the hubby! Yay!
Moroccan Chicken Tagine
(adapted from Simply Recipes and My.Recipes)
For the Chicken:
3 to 4 pcs bone-in chicken thighs
3 tbsp Moroccan spice
2 tbsp honey
1 clove garlic, minced
1/4 cup extra virgin olive oil
For the Tagine:
1 large or 2 medium onion, chopped
1 to 2 cloves garlic, minced
3 to 4 carrots, chopped to 1-inch pieces
1/4 cup large golden raisins
1/4 cup pitted oil-cured olives
juice of 1 lemon
1/2 lemon rind, pulp removed and thinly sliced
1 tbsp saffron water (or a pinch of saffron)
1/2 cup low-sodium chicken broth
salt and pepper, to taste
water, as needed
chopped parsley, for garnish
 
Marinate the chicken:
Combine chicken, spice, honey, garlic, and olive oil in a ziplock bag. Massage the marinade into the chicken to make sure it's evenly coated then marinate overnight (or up to 2 days) before making the tagine.
Make the tagine:
On cooking day, heat a heavy-bottomed pan over medium heat. Add the chicken, skin-side down, along with marinade liquid. Cook the chicken until lightly browned then turn over and repeat with the other side. Once the chicken is lightly browned on both sides, add the remainder of the ingredients except for broth.
Cook mixture for about ten minutes. Add broth, scraping the bottom of the pan, then cover with a tight-fitting lid. Cook for another 15 to 20 minutes, or until chicken is cooked and tender. If the dish is too dry, add water as needed and cook for a further few minutes. Season with salt and pepper, as needed, then serve garnished with parsley.
Makes 4 servings.
Honey Roasted Beets
(makes 4 servings)
5 small red beets, quartered
5 small golden beets, quartered
1/4 cup extra virgin olive oil
2 tbsp honey
1 tsp fresh thyme
salt and pepper, to taste
2 tbsp white balsamic vinegar, flavored or plain
2 tbsp chopped parsley
 
Preheat oven to 375F degrees.
Whisk together olive oil, honey, and thyme. Season with salt and pepper to taste. Toss into beets then evenly spread onto a foil-lined baking sheet.
Roast for 30 to 40 minutes until tender. Remove from oven then add vinegar and parsley. Toss to coat, then transfer to a serving bowl. Drizzle pan juices over beets then serve.
Friday, February 5, 2016
pear-fectly nuts.

Expectation: Making a breathtakingly beautiful but simple cake that looks exactly like the picture.
Reality: Not following directions and adding this and that and getting a cake that looks "okay"
I guess that's an insane thing to think, especially since I din't even follow the directions. I'm just one of those people that looks at a perfectly good recipe and says, "that's good, but what if I . . .". And that, as they say, is that.
But despite the substitutions and everything, the directions were surprisingly a little hard to follow. While it's stated in very simple terms, I'm more of a detailed baker. How much am I supposed to stir it? Do I whisk the dry ingredients together first then add it to the batter? How am I supposed to put the pear on it? Directions like that would've definitely helped.


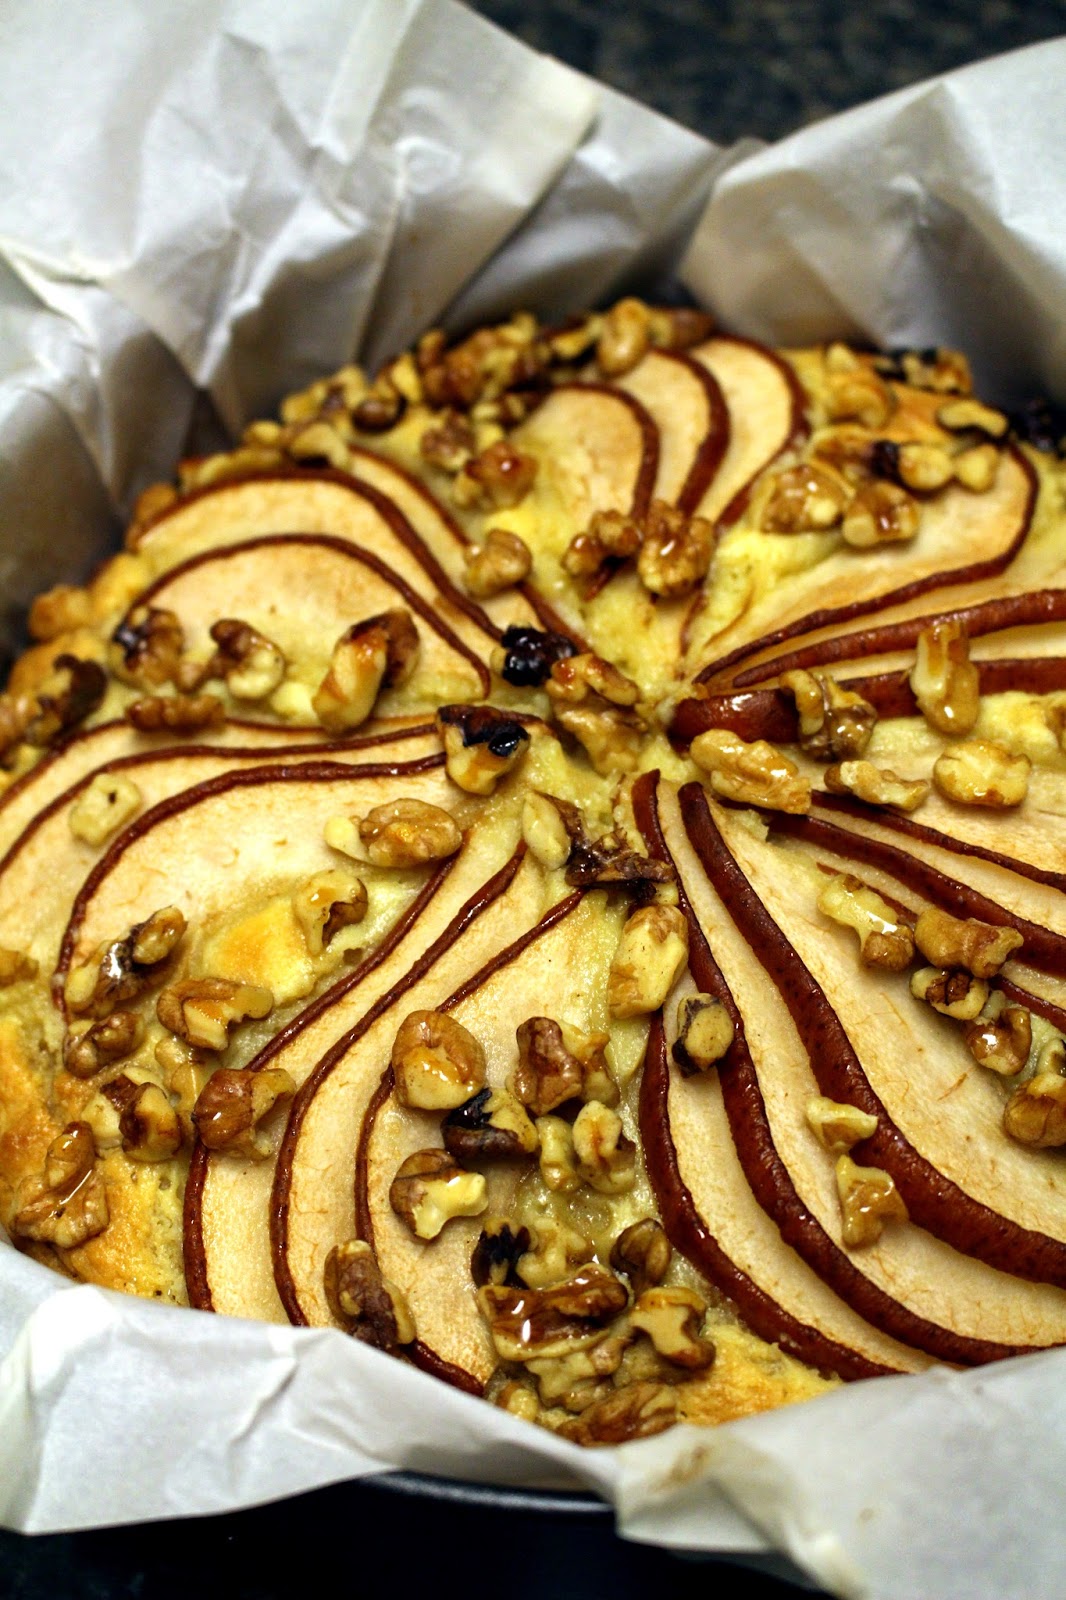
While the directions did say to peel the pears first, I figured that leaving the skin on would be okay. I should've listened to the directions. Cutting into the cake was a little hard and the skins pulled slices of pears from the top of the cake. Also, I found that one thinly sliced pear was enough for the topping. Where she put the other pear is beyond me.
Regarding sweetness, this was a lightly sweetened cake. I knew that this wasn't going to be sweet enough for me, so I decided to pour some honey on top to not only add sweetness, but also to caramelize the nuts and pears since they didn't seem to be sinking into the batter like it showed in the picture. But again, this was probably the substitutions at work.
When all was said and done, this didn't turn out too bad. I served this with some additional honey, a dusting of powdered sugar, and some sweetened whipped coconut cream. Below is the "next-time-I-make-this" recipe adaptation:
Pear Walnut Cake
(slightly adapted from Tartelette)
2 large eggs
1/2 to 3/4 cup granulated sugar
3/4 cup good quality olive oil
1 cup plain, low-fat or whole milk yogurt
zest and juice of a lemon
2 cups all-purpose flour
2 teaspoons baking powder
1/4 tsp salt
1 large pear, peeled and thinly sliced
1/3 cup walnuts, chopped
1/4 cup honey, warmed
powdered sugar, for garnish
 
Preheat oven to 350F degrees and line a 9-inch baking pan with parchment paper sprayed with a little cooking spray.
In a large bowl, whisk together the eggs and sugar for about 2 minutes until light and lemon-colored. Add the olive oil, yogurt, lemon juice and zest and whisk again so that everything is well mixed. Add flour, baking powder and salt and mix just until the batter is smooth. Do not over mix.
Pour the mixture in the prepared baking pan. Place the pear slices on top, slightly diagonal and pressing gently into the cake, then sprinkle with the walnuts. Bake for about 40-45 minutes or until a toothpick inserted in the middle comes out free of crumbs. In the last 20 minutes of baking, drizzle the honey on top of the cake and return to the oven to finish baking.
Let cool completely before slicing and dusting with powdered sugar. Serves 8.
Friday, December 25, 2015
christmas time poussin.

Merry Christmas!
Me and the hubby did another round of big cooking, but this time, sans extra people. At first, I thought that I would be weird to cook so much food for just the two of us, but I was pleasantly surprised at how enjoyable it was. We had Christmas music blaring on the radio and me and the hubby were chatting and joking around the entire time. It felt nice and festive even though it was just the two of us. :)
Let me tell you, it was still a lot of work. We were in the kitchen for nearly four hours to create our Christmas feast! In the end though, It was totally worth it. We had some whiskey brown ham, green beans, mashed sweet potatoes, creamed corn, stuffing, cranberry sauce, and a couple of game hens in lieu of turkey.
For the game hens, I decided to try out a recipe that called for pomegranate molasses. When I was back in San Diego, I picked up some Mid-Eastern essentials and a bottle of pomegranate molasses happened to be one of them. Since then, it's been sitting in the back of my pantry, waiting to be used.
When I made this recipe, I made the mistake of marinating this for just one hour. DON'T DO THAT. In order for this to be successful, it really needs to sit overnight. Otherwise, you'll get a nice tasting skin, but no flavor on the actual poultry itself. Also, I did a rookie mistake of not adding enough salt and pepper. So, again, season well people.
Other than that, this turned out well, I thought. If I had properly marinated them, this dish would've been kick ass! The sweet tartness of the molasses really worked with the cinnamon and allspice to make a really tasty flavor combination. And the honey made a beautiful glaze that makes it finger-lickin' good. Next time, I'm trying this on a whole turkey!
Roasted Game Hen with Pomegranate, Honey, and Cinnamon
(slightly adapted from One Girl in the Kitchen)
2 game hens, butterflied and ribs removed
1/3 cup pomegranate molasses
2 cloves garlic, minced
cinnamon, allspice, cayenne pepper, black pepper, salt, olive oil to taste
3 to 4 tbsp honey
 
Rinse the game hens and pat them dry them thoroughly on the inside as well. Mix the molasses with plenty of cinnamon, allspice, cayenne pepper and minced garlic. Pour the marinade over the hens and rub them so that the flavor gets everywhere. Let them rest in the refrigerator, covered with plastic, for at least 8 hours, turning them occasionally.
After this time, drain the hens from the marinade, sprinkle each one with salt and pepper, and tie their legs with kitchen twine. Arrange them chest side up on an greased baking pan, and bake at about 375 for approximately 35 to 40 minutes. At the end, brush them with the honey and bake 5 more minutes or until internal temp reads at 155F degrees. Let stand 10 to 15 minutes in order to reach a safe eating internal temperature of 165F degrees.
Serve each hen on a individual plate and garnish with fresh thyme sprigs and pomegranate seeds.
Monday, June 1, 2015
going a little nuts...

Sometimes when I look through desserts on Pinterest, I get carried away and pin almost every dessert I come across. Every. Single. Delectable one I see. I have almost 4,500 pins alone just for sweets!! And I plan on making them all... one day. Yeeees... oh yeeeeeeeeees.....
*AHEM*
Sometimes, when I see a healthy dessert, it makes me wanna try and make a recipe even more. The fact that these bars are so easy to make and I virtually have everything listed in the ingredients list was a major plus! One problem though... I kind of didn't follow the recipe.

Let me explain... Turns out I was out of some of the things. Like maple syrup. Or canola oil. Or raisins. Or pastry flour. And I wanted to get rid of things that I had hanging around... like a handful of cinnamon chips. And pecans. And dried cranberries. And blueberries. So yeah...
They're not as "healthy" as the original, but they didn't turn out so bad. It's got the taste of granola with a nutty, almost shortbread-like crust. I thought they were awesome. Definitely adding this to my cookie repertoire. Next time I will bake them a little less though... following the recipe almost burned them (hence why they look a little dark)! The sweet spot is definitely around the 25 to 30 minute mark. Maybe even less. Hmmmm.... Anyway, enjoy!

Cinnamon Honey Fruit and Nut Bars
(adapted from Healthy Seasonal Recipes)
½ cup chopped walnuts
2 cups chopped pecans, divided
1 tbsp granulated sugar
¾ cup whole wheat flour
3 tbsp plus 1 tsp all-purpose flour, divided
½ tsp salt, divided
3 tsp ground cinnamon, divided
2 eggs, plus 1 egg yolk, divided
1/3 cup unsalted butter, melted and divided
3 tbsp vegetable oil
½ cup honey
1 tsp vinegar
1 tbsp pure vanilla extract
½ cup dried cranberries
½ cup dried blueberries
¼ cup cinnamon chips
 
Preheat oven to 400 degrees F. Coat an 8 x 8 baking dish with cooking spray.
For the crust:
Place ½ cup walnuts and sugar in a food processor fitted with steel blade attachment. Process until the walnuts are the consistency of rough meal. Add whole wheat flour, 3 tbsp all-purpose flour, ¼ teaspoon salt, and 1 tsp cinnamon and pulse until combined.
Stir together 1 egg yolk, 2 tablespoon melted butter, and oil in a small bowl.
With the food processor motor running, drizzle yolk mixture through the feed tube and process until mixture clumps together.
Turn mixture out into the prepared pan; spread evenly and press firmly into the bottom to form a crust. Prick all over with a fork and transfer to the oven. Bake, pressing down with the back of a fork only if it starts to puff, until dry and slightly golden along the edges, 13 to 15 minutes.
For the filling:
Meanwhile, whisk honey, vinegar, vanilla, the remaining ¼ teaspoon salt, the remaining 2 tsp cinnamon, the remaining 2 eggs and the remaining butter in a medium bowl, reserving ¼ cup of the honey mixture for topping. Add in ½ cup of chopped pecans. Stir in the dried fruit. Set aside.
For the topping:
Mix the reserved ¼ cup of honey mixture in a small bowl with the remaining 1½ cup of chopped pecans. Set aside.
Putting the bar together:
Remove the crust from the oven and reduce oven temperature to 350 degrees F. While the crust is hot, brush the remaining 1 tsp flour over the crust with a pastry brush to fill in any holes or cracks.
Spread the fruit and nut mixture in the baked crust. Arrange pecan topping over the top. Drizzle on any remaining honey mixture then evenly sprinkle on the cinnamon chips.
Bake for 25 to 30 minutes or until the center no longer jiggles when gently shaken, the top is lightly crackled, and the filling is set. Cool completely, at least 1 hour. Cut into 16 squares.
Monday, February 16, 2015
makin' it easy...


Ever since I bought a bag of lentils, the only thing I've ever made with them was with a salmon recipe. They turned out pretty alright, but I wanted an opportunity to make something that wasn't entirely "ethnic" tasting. So, I looked on the internets and found this recipe that seemed promising. No hard-to-find spice....no overly exotic anything except for the balsamic vinegar... and only one pot needed.
Perfect!
I did run into trouble when I found that I didn't have any balsamic though... So, being the experimental type that I am, I decided to sub the balsamic for cider. I also added some honey and a handful other stuff I thought would make the chicken tasty. Also, when I made lentils the first time, I noticed that I wanted a little bit more veggie boost to round out the taste. With that in mind, I threw in some frozen veggies to add a bit of interest and texture to the lentils.
So, while I kind of followed the recipe, a little deviating happened from the original. My guess? I'm betting the original would probably taste just as good as *this* awesome McGyvered version. :)

One-Pot Honey Cider Chicken with Caramelized Carrots and Lentils
(adapted from Skinny Ms.)
3 chicken thighs, skinless boneless
1/4 cup honey
2 tbsp apple cider vinegar
1 tsp worcestershire sauce
1 tsp onion powder
1/2 tsp garlic powder
1/4 plus 1 tsp paprika, divided
3 garlic cloves, minced
1 medium onion, divided (1/2 finely chopped, 1-1/2 sliced)
1 bag baby carrots, divided (3-4 pcs finely chopped, the rest left whole)
1 stalk celery, finely chopped
1 medium tomato, coarsely chopped
1/4 cup frozen vegetables
1/2 cup dried green lentils
2 cups chicken broth
2 bay leaves
extra virgin olive oil
salt and pepper, to taste
Combine chicken, honey, vinegar, onion powder, garlic powder and 1/4 teaspoon paprika in a small bowl. Season with salt and pepper. Set aside to marinate.
Over medium heat, in a saucepan with extra virgin olive oil, sautè the garlic, 1/2 onion that has been finely chopped, and the remaining 1 tsp of paprika. After tossing for about 2 minutes, add the carrot that has been finely chopped, celery, tomatoes, and frozen vegetables and cook for 5 minutes. Add the lentils and toss for 1 minute in the saucepan. Pour the broth and add the bay leaves, let it boil and cook for 30 minutes or until they are tender. If they are drying up, add more hot broth or hot water. Season with salt and pepper. When they are cooked, set them aside in a bowl.
Wipe the saucepan with a paper towel to prepare cooking the chicken and carrots. Over medium heat, add extra virgin olive oil to the saucepan and cook the chicken with the marinade. Brown both sides. Half-way through cooking the chicken, add the remaining whole carrots and sliced onions. Cook until tender. Note: I found I had to remove the chicken from the pan and let the carrots and onions caramelize for a little bit so my meat didn't overcook. Afterwards, I returned the chicken to the pan before proceeding to the next step...
Push the chicken on one side of the saucepan and the carrots and onions to the other side. Return lentils to the saucepan in the cleared space and cook some more for 2 minutes to warm. Once warmed, serve immediately.
Makes 2 to 3 servings.
Thursday, September 12, 2013
portable granola.
I love granola. seriously, I do. I like them plain, with nuts, with fruit, on yogurt, in bread...you name it, I like 'em with, it, on it, and made from it. I remember a few years back, I went out on a granola binge and for days on end granola would be the only thing that people would see me eating. I had six or seven boxes at any given time and they would all be gone in a couple of weeks. that's not even including the bars i kept everywhere. yeah..it was bad.
but for all that granola loving that I did, I never once made my own granola or granola bar. which is weird, considering it's relatively easy to make. so I decided to make some bars. I decided on this recipe since the pictures looked so damn good. I love them chewy granolas! I made some substitutions based on what i had on hand and the resulting granola bars weren't as chewy as i'd hoped. but! they were good none the less and came out having a strong peanut-butter taste. next time, i'm gonna follow the recipe and see what they're supposed to taste like. :) here's the original recipe:
Thick and Chewy Granola Breakfast Bars
(from Smells Like Home)
1 2/3 cups oats (quick-cooking or old fashioned)
1/2 to 3/4 cup granulated sugar (use more for a sweetness akin to most purchased bars; use less for a mildly sweet bar; omit altogether if your add-ins are super sweet)
1/3 cup oat flour (or 1/3 cup oats, processed till finely ground in a food processor or blender)
2 tbsp finely ground flax seed (optional)
1/2 tsp salt
1/2 tsp ground cinnamon
2 to 3 cups dried fruits, nuts, chocolate, coconut, seeds, etc. (total of 10 to 15 ounces)
1/3 cup peanut butter or another nut butter (optional but recommended)
1 tsp vanilla extract
6 tbsp melted butter
1/4 cup honey or maple syrup
2 tablespoons corn syrup (light or Lyle’s Golden)
1. Preheat oven to 350 degrees F. Line the bottom of an 8-inch square pan with parchment paper leaving the ends of the paper to hang up and over the two opposite sides of the pan. Lightly grease the paper and the exposed sides of the pan.
2. In a large bowl, stir the oats, sugar (if using), oat flour, flax, salt, cinnamon, and your dry add-ins together. In a separate medium bowl, whisk the peanut butter, vanilla, butter, honey/maple syrup, and corn syrup together until will combined and smooth. Immediately pour the wet mixture over the dry ingredients and with a rubber spatula, mix everything together until the oats are well-coated and sort of crumbly.
3. Transfer the granola mixture to the pan, pressing it down firmly and evenly into the pan. Make sure the granola is tucked into the corners and sits tightly up against the sides of the pan – this will help when cutting them. Bake for 30 to 40 minutes, until the top is nicely browned. Cool the pan on a wire rack for 20 minutes then transfer the uncut bars on the parchment paper from the pan to the rack to cool completely. Once they’ve cooled, transfer them to the fridge to set up well before cutting. Cut into 2-inch square pieces.
EDIT: found another good recipe that's somewhat similar to this one but a little less peanut buttery. tried this recipe and it was killer! gotta make more...!
Thursday, July 18, 2013
eating beer.
my yeast died today. i found out when i had the random itch to bake some bread. although, after being stored for so long, it doesn't really come as that much of a surprise. :/
i took out my yeast, proofed it in warm water, and was dismayed that it didn't come alive. now what do i do?? then an idea struck me: we have beer in the fridge! i'm not really that much of a big beer drinker. although the boyfriend loves the stuff, i'm more opt to get a glass of juice or a cup of tea. and whenever we have a big gathering at the house, i find that we always have a handful of beers leftover from the festivities just there sitting lonely in the corner of the fridge . . . undrank . . . unused . . . neglected. needless to say, i was estactic of the idea of being able to get rid of a couple of bottles short of drinking them!
after a quick search on the internets, i found this recipe to try. it seemed easy enough and i had the ingredients to make it. made a few modifications and out came a moist, slightly sweet bread with a soft and chewy consistency (think of a super moist banana bread with more of a chew). this was great to snack on as-is with some mild havarti and some fruit. i've also used this as a french toast and it paired perfectly with puddle of pure maple syrup. would i make this again? definitely!
 
Honey Whole Wheat Beer Bread
(adapted from Farmgirl Fare)
2 cups organic whole wheat flour (i used wheat montana's bronze cheif whole wheat flour)
1 cup organic all-purpose flour (i used gold medal's all-purpose flour)
1 Tablespoon granulated sugar (i subbed 2 tbsp dark brown sugar)
1 teaspoon salt (added about 1/4 tsp or so)
1 Tablespoon baking powder (make sure it's fresh!) (i added 1/2 tsp or so more)
14 ounces beer (or 12 ounces beer & 2 ounces water) (used about 1 1/2 bottles of stella artois to get a "thick batter")
1/4 cup honey (or less)
Optional glaze: 1 egg & 2 teaspoons water, beaten
Heat the oven to 375 degrees. In a large mixing bowl, combine the flour, sugar, salt, and baking powder. Slowly stir in beer (and the honey) and mix just until combined. The batter will be thick.
Spread in a greased 8-inch loaf pan (i used a parchment lined baking pan), brush with the egg glaze if desired (skipped this), and bake until golden brown and a toothpick stuck in the center comes out clean, about 45 minutes. (mine took almost an hour to bake. also, about 20 minutes before it was done, i spread some butter on top and let it finish in the oven for some buttery-top goodness!)
Cool in the pan on a rack for 10 minutes. Remove from the pan and cool 10 more minutes. Serve warm or at room temperature.
Wednesday, July 10, 2013
dinner of leftovers.
Tuesday, April 16, 2013
honey, you're so sweet.

i like bread. i really do. in fact, i'm going to go ahead and say that i *love* bread. If carbs didn't have to love me back on my thighs, arms, and face, i'd eat it every day with possible everything. but alas, bread is something that i have to eat in moderation...no more than a couple of slices a day. but sometimes i binge...oh, do i binge! like making bread every few days.
so when i find a cool recipe that i like, i tend to try it and see if i like what comes out. i especially like the easy recipes since i don't have a lot of time...like this one. the recipe's been around for a while but i'm pretty new to bread baking so it's exciting to find something that's relatively healthy and tasty.
i did end up making this dough twice though. the first try had lack-luster results when i baked it in a bread pan with a steam tray underneath. i really expected some hole-y bread! instead, it came out dense and deflated. urgh... i wanted to try again though, this time doing the dutch oven method with no fridge time and and it came out more holey (if not by much) and less flat. it did have a large spread while baking but i'm putting that down to the size of my pot. *sigh* try and try again...
Traditional American-Style Honey Whole Wheat Bread
(adapted from King Arthur Flour)
3 cups bread flour
1/2 cup whole wheat flour
1 1/2 tsp salt
2 1/4 tsp active dry yeast
2 tbsp vital wheat gluten
1/4 cup honey
1 1/2 or so cups warm water
olive oil
In a large bowl, combine flour, salt, and yeast, and vital what gluten. In a measuring cup, combine the warm water (about 100 degrees in temp) and honey. Add wet to dry and mix to create a shaggy dough. If the dough is too dry, add additional water little by little until the dough is no longer dry but still sticky and shaggy. Transfer to an oiled bowl, cover and let rise until doubled (about an hour). Prepare a sheet of parchment paper to use for the dough later on.
When doubled, knead the dough in the bowl for a couple of minutes then transfer to the parchment paper. Cover loosely with plastic wrap and let rise again until doubled (about 30 or so minutes).
Meanwhile, ready a cast iron pot with a lid in the oven on the middle rack and preheat to 450 degrees. Once the dough is ready and the oven is hot, carefully place the dough and parchment paper in the cast iron and cover immediately with the lid. Bake for 35 to 40 minutes. Reduce heat to 425 degrees, carefully remove the lid, and bake an additional 20 minutes until top is golden brown. Once done, transfer the bread to a cooling rack and cool completely before serving.