Showing posts with label walnuts. Show all posts

Friday, February 5, 2016

pear-fectly nuts.


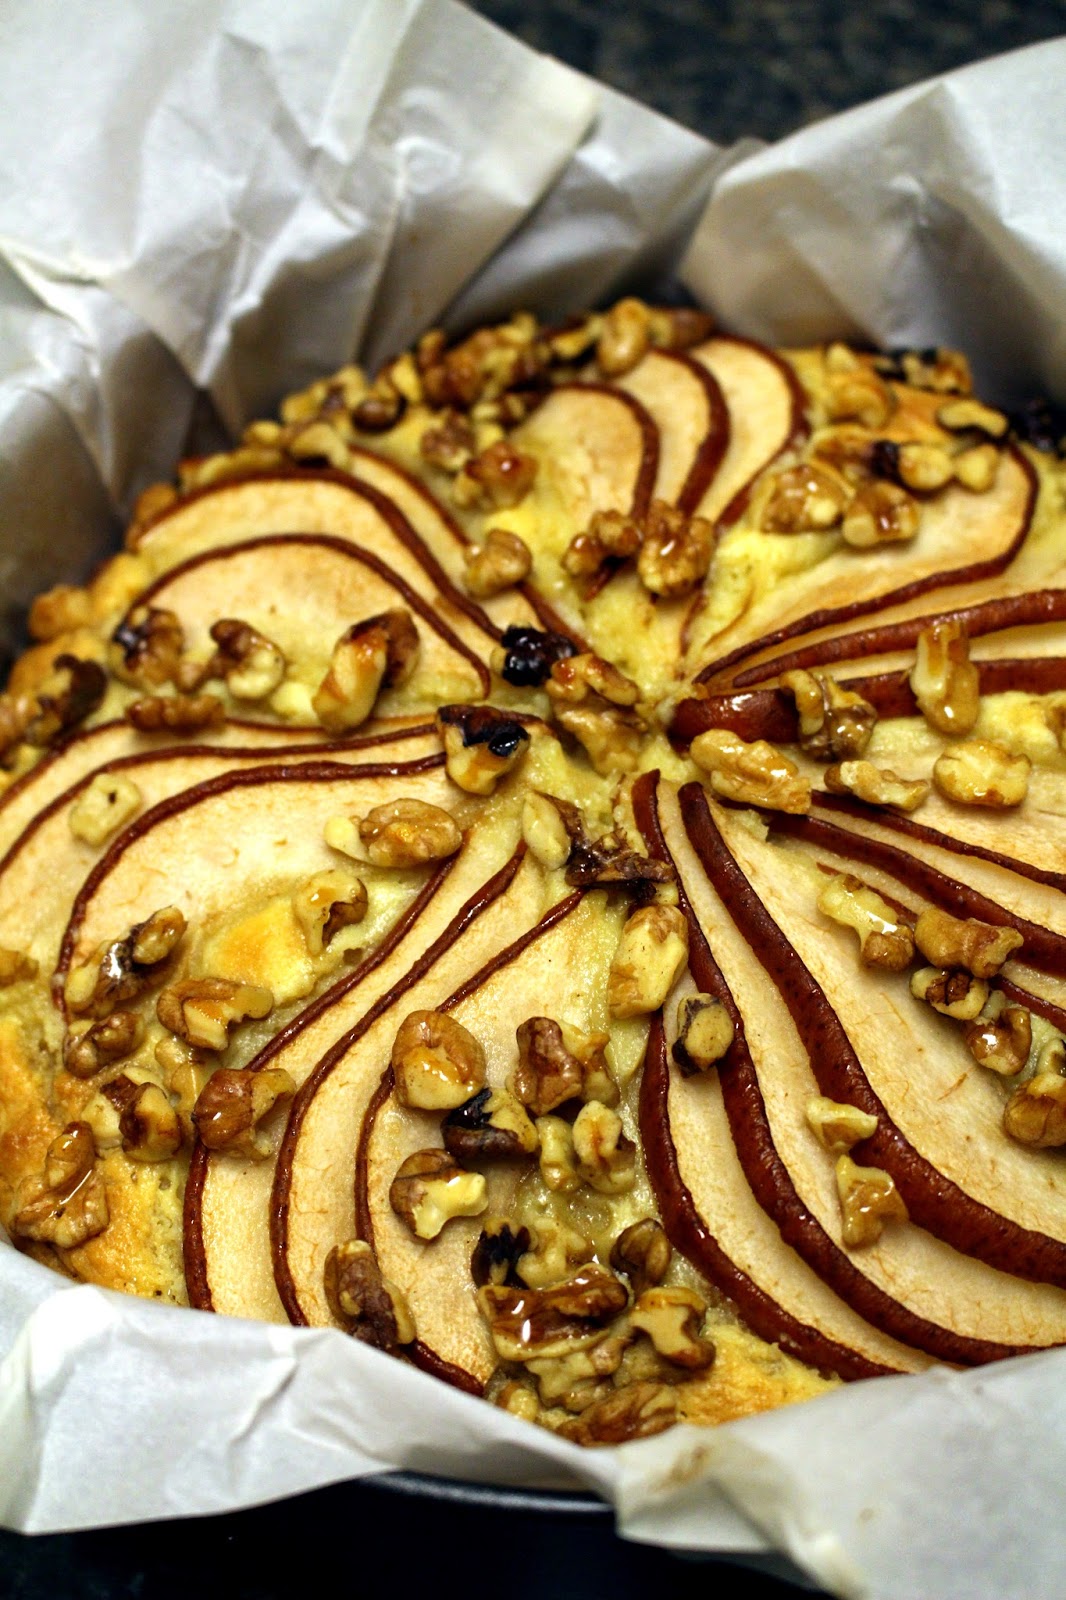
Expectation: Making a breathtakingly beautiful but simple cake that looks exactly like the picture.
Reality: Not following directions and adding this and that and getting a cake that looks "okay"

I guess that's an insane thing to think, especially since I din't even follow the directions. I'm just one of those people that looks at a perfectly good recipe and says, "that's good, but what if I . . .". And that, as they say, is that.

But despite the substitutions and everything, the directions were surprisingly a little hard to follow. While it's stated in very simple terms, I'm more of a detailed baker. How much am I supposed to stir it? Do I whisk the dry ingredients together first then add it to the batter? How am I supposed to put the pear on it? Directions like that would've definitely helped.


While the directions did say to peel the pears first, I figured that leaving the skin on would be okay. I should've listened to the directions. Cutting into the cake was a little hard and the skins pulled slices of pears from the top of the cake. Also, I found that one thinly sliced pear was enough for the topping. Where she put the other pear is beyond me.

Regarding sweetness, this was a lightly sweetened cake. I knew that this wasn't going to be sweet enough for me, so I decided to pour some honey on top to not only add sweetness, but also to caramelize the nuts and pears since they didn't seem to be sinking into the batter like it showed in the picture. But again, this was probably the substitutions at work.

When all was said and done, this didn't turn out too bad. I served this with some additional honey, a dusting of powdered sugar, and some sweetened whipped coconut cream. Below is the "next-time-I-make-this" recipe adaptation:

---- o o o o ----
 

Pear Walnut Cake
(slightly adapted from Tartelette)

2 large eggs
1/2 to 3/4 cup granulated sugar
3/4 cup good quality olive oil
1 cup plain, low-fat or whole milk yogurt
zest and juice of a lemon
2 cups all-purpose flour
2 teaspoons baking powder
1/4 tsp salt
1 large pear, peeled and thinly sliced
1/3 cup walnuts, chopped
1/4 cup honey, warmed
powdered sugar, for garnish

 
Preheat oven to 350F degrees and line a 9-inch baking pan with parchment paper sprayed with a little cooking spray.

In a large bowl, whisk together the eggs and sugar for about 2 minutes until light and lemon-colored. Add the olive oil, yogurt, lemon juice and zest and whisk again so that everything is well mixed. Add flour, baking powder and salt and mix just until the batter is smooth. Do not over mix.

Pour the mixture in the prepared baking pan. Place the pear slices on top, slightly diagonal and pressing gently into the cake, then sprinkle with the walnuts. Bake for about 40-45 minutes or until a toothpick inserted in the middle comes out free of crumbs. In the last 20 minutes of baking, drizzle the honey on top of the cake and return to the oven to finish baking.

Let cool completely before slicing and dusting with powdered sugar. Serves 8.


Monday, February 1, 2016

please, with a cherry inside?


I love sweet things. I've got a pretty hardcore sweet tooth. In fact, I'm one of those people who gets the frosting from other people's cake. :) And since Valentine's Day is just around the corner, that means a plethora of chocolates, cookies, and candies available in the stores. And did I mention cakes and brownies? Yumm!

Speaking of brownies, I tried making some a few months ago. When I was going through my pantry, however, I found that I was unfortunately out of cocoa powder. So what's the alternative? Blondies, of course! I found a great decadent recipe for white chocolate cherry almond blodies and, boy, were they rich! I guess 1 1/2 stick of butter will do that. I think the main issue I had was all that butter. While they tastes sinfully good, I just couldn't get the butter factor out of my mind each time I took a bite. I've been on a hunt for a better recipe ever since.


This recipe piqued my interest. With a title of No Butter Baking. on the blog, I thought that I finally hit jackpot! No butter in sight and the blodies themselves looked decent. There is, however, a half cup of oil. Hmm...

Since I wasn't sure how these were going to turn out, I decided to improvise a little and play with the recipe. Semi-solid coconut oil replaced the vegetable oil in order to mimic fluffiness of the butter. There isn't really any liquor in my house so the brandy was switched with pure vanilla extract. I added some whole wheat flour to help soak up the inevitable liquid that this was going to produce and added some walnuts, just because. Also, I wanted to see if I could lift the batter a little, so I added some leavening agents to the dry mixture.

So what did I end up with? Not a bad blondie. It was kind of greasy though, which I expected. But since I used coconut oil, I just popped them in the freezer for a bit which helped with the texture and cutting. I think if I added another 1/4 cup of whole wheat flour or reduced the oil just a bit, these might've turned out a little bit better. Although, I'd probably end up with a stiffer dough. I still have to play around with the recipe, but all in all, this didn't turn out too bad. :)

---- o o o o ----
 

White Chocolate Cherry Walnut Blondies
(adapted from No Butter Baking.)

1/2 cup semi-soft coconut oil
1 cup loosely packed dark brown sugar
1 egg
1/2 tsp vanilla
1/4 tsp salt
3/4 cup all-purpose flour
1/4 cup whole wheat flour
1/2 tsp baking soda
1/2 tsp baking powder
1/4 cup white chocolate chips
1/4 cup dried cherries
1/4 cup toasted chopped walnuts

 
Preheat oven to 350F degrees. Line

In a large bowl, cream together coconut oil and brown sugar. Add egg, vanilla, and salt, and whip until fluffy.

In a separate bowl, whisk together flours, baking soda, and baking powder until well combined. Add to wet ingredients along with white chocolate chips, cherries, and walnuts.

Pour batter into a parchment lined pan and level. Sprinkle top with additional cherries, chips, and walnuts and gently press into the batter.

Bake for 25 to 30 minutes or until tester inserted in center comes out clean. Let cool completely in pan then chill in the freezer for 5 to 10 minutes for easier cutting. Remove from freezer then cut into 16 squares.


Monday, June 1, 2015

going a little nuts...


Sometimes when I look through desserts on Pinterest, I get carried away and pin almost every dessert I come across. Every. Single. Delectable one I see. I have almost 4,500 pins alone just for sweets!! And I plan on making them all... one day. Yeeees... oh yeeeeeeeeees.....

*AHEM*

Sometimes, when I see a healthy dessert, it makes me wanna try and make a recipe even more. The fact that these bars are so easy to make and I virtually have everything listed in the ingredients list was a major plus! One problem though... I kind of didn't follow the recipe.

Let me explain... Turns out I was out of some of the things. Like maple syrup. Or canola oil. Or raisins. Or pastry flour. And I wanted to get rid of things that I had hanging around... like a handful of cinnamon chips. And pecans. And dried cranberries. And blueberries. So yeah...

They're not as "healthy" as the original, but they didn't turn out so bad. It's got the taste of granola with a nutty, almost shortbread-like crust. I thought they were awesome. Definitely adding this to my cookie repertoire. Next time I will bake them a little less though... following the recipe almost burned them (hence why they look a little dark)! The sweet spot is definitely around the 25 to 30 minute mark. Maybe even less. Hmmmm.... Anyway, enjoy!

---- o o o o ----
 

Cinnamon Honey Fruit and Nut Bars
(adapted from Healthy Seasonal Recipes)

½ cup chopped walnuts
2 cups chopped pecans, divided
1 tbsp granulated sugar
¾ cup whole wheat flour
3 tbsp plus 1 tsp all-purpose flour, divided
½ tsp salt, divided
3 tsp ground cinnamon, divided
2 eggs, plus 1 egg yolk, divided
1/3 cup unsalted butter, melted and divided
3 tbsp vegetable oil
½ cup honey
1 tsp vinegar
1 tbsp pure vanilla extract
½ cup dried cranberries
½ cup dried blueberries
¼ cup cinnamon chips

 
Preheat oven to 400 degrees F. Coat an 8 x 8 baking dish with cooking spray.

For the crust:
Place ½ cup walnuts and sugar in a food processor fitted with steel blade attachment. Process until the walnuts are the consistency of rough meal. Add whole wheat flour, 3 tbsp all-purpose flour, ¼ teaspoon salt, and 1 tsp cinnamon and pulse until combined.

Stir together 1 egg yolk, 2 tablespoon melted butter, and oil in a small bowl.

With the food processor motor running, drizzle yolk mixture through the feed tube and process until mixture clumps together.

Turn mixture out into the prepared pan; spread evenly and press firmly into the bottom to form a crust. Prick all over with a fork and transfer to the oven. Bake, pressing down with the back of a fork only if it starts to puff, until dry and slightly golden along the edges, 13 to 15 minutes.

For the filling:
Meanwhile, whisk honey, vinegar, vanilla, the remaining ¼ teaspoon salt, the remaining 2 tsp cinnamon, the remaining 2 eggs and the remaining butter in a medium bowl, reserving ¼ cup of the honey mixture for topping. Add in ½ cup of chopped pecans. Stir in the dried fruit. Set aside.

For the topping:
Mix the reserved ¼ cup of honey mixture in a small bowl with the remaining 1½ cup of chopped pecans. Set aside.

Putting the bar together:
Remove the crust from the oven and reduce oven temperature to 350 degrees F. While the crust is hot, brush the remaining 1 tsp flour over the crust with a pastry brush to fill in any holes or cracks.

Spread the fruit and nut mixture in the baked crust. Arrange pecan topping over the top. Drizzle on any remaining honey mixture then evenly sprinkle on the cinnamon chips.

Bake for 25 to 30 minutes or until the center no longer jiggles when gently shaken, the top is lightly crackled, and the filling is set. Cool completely, at least 1 hour. Cut into 16 squares.

Tuesday, March 17, 2015

taste it and make it: chicken salad!


Back in 2003, I used to work for Boudin Bakery at the downtown mall back in San Diego. I spent a whopping four years there making salads, sandwiches, and realizing that sourdough wasn't so icky after all. It was also there that I found my love of making all things sandwiches.

Of all the sandwiches that I used to make at my time there, there were two kinds that I really, really loved: their tuna sandwich and their chicken walnut. When I left, and years passed, I've developed my own tuna recipe that was based off Boudin's. Their chicken salad, however, was something that I miss and would never change.

Well...unfortunately, when I went to Boudin the last time and ordered their fabulous chicken salad sandwich, I found that they had changed the recipe. Gone were the walnuts and the cranberries that used to dot the salad. And where was the walnut bread that they used to serve the sandwich on?? This was NOT the sandwich that I loved!

So I've been thinking about the recipe for a while now...and trying to remember exactly what went into the salad. Pre-cooked grilled chicken definitely went in it, as well as Dijon mustard. Granny smith apples, cranberries, and toasted walnuts were also in the mix. Today, I decided to finally sit down and try to re-create the recipe from all those years ago. The result? Exactly like I remembered and a kick-ass copy cat, if I do say so myself.

Ladies and gentlemen, here's Boudin's old-school chicken walnut salad...

---- o o o o ----
 

Chicken Walnut Salad
(adapted from Boudin Bakery)

2 to 3 cups cooked chicken, cubed (I usually use this or a couple packages of this)
1 cup walnuts, toasted and chopped
1 granny smith apple, chopped
1.5 to 2 cups (about 4 ribs) celery, diced small
1 cup dried cranberries
1 small red onion, chopped
1/4 cup fresh Italian parsley, finely chopped
2 tbsp Dijon mustard
3/4 cup or so mayonnaise
kosher salt
coarse ground pepper

Combine chicken with walnuts. Add remaining ingredients to the bowl except for the mayo. Slowly add mayo until desired consistency is reached, adding additional mayo if needed and seasoning with salt and pepper to taste. Let chill for 30 minutes before serving. Store in an airtight container in the refrigerator.

If using homemade mayonnaise, this will keep for three days. If using store bought, chicken salad will keep for up to a week.

Serving suggestions: Serve on sourdough or walnut bread with romaine lettuce as a sandwich or on spring lettuce/romaine mix with additional dried cranberries and candied walnuts with a side of walnut bread as a salad.

Wednesday, March 4, 2015

vintage bread.


I don't think I'm a banana kind of gal. Whenever I buy bananas, there always seem to be a lot left from the bunch. Even if I buy three pieces, the last two just seem to stay in the fruit basket for days on end. Usually, I end up freezing them before they start to rot. Even then, I only use a little bit banana in my smoothies...I find that using a lot makes them a tad too thick for my liking.

So, since I went grocery shopping about a week ago and grabbed a small bunch of bananas on impulse, I was left with some bananas that were turning a bit brown. A lot brown, actually. I actually put them in the fridge to delay the inevitable. Alas, they still turned before I even got to touch them. *sigh*

I took this opportunity to make some banana bread.


Since they were so brown, I wanted to try this recipe that I saved. It was a recipe from 1933 that the author of the website slightly doctored up. It didn't look too complicated...simple ingredients with straightforward instructions. I think the main reason that I wanted to make it was the name. "Black Bananas" seemed like an interesting thing to use, lol.

So how did it turn out? It was okay. Not too sweet and a little buttery. I used only half the bananas suggested and left out the nuts, so that may have affected the outcome. Also, my bananas weren't quite black yet so It wasn't so banana-ey as I hoped they would be. What I really liked was the texture of the bread. It was nice and soft and almost spongey...liked good quality sliced bread.

Would I make it again? Maybe...I think next time I'll swap out half the white sugar with brown and add some vanilla extract for added flavor. In the meantime, here's the original recipe...

---- o o o o ----
 

Vintage Black Banana Nut Bread
(from Bake This Bread!)

1 1/2 cups mashed bananas from dark-skinned ripe bananas (about 4 to 5 large)
1/3 cup unsalted butter, room temperature
2 cups all-purpose flour
1 cup sugar
1 teaspoon baking soda
1 teaspoon baking powder
1 teaspoon salt
1 teaspoon dried cultured buttermilk (optional)
1/2 cup fine-chopped walnuts (substitute pecans or favorite nuts)
2 eggs, fork beaten
1 Tablespoon fresh lemon juice (from 1 large lemon)
1/3 cup milk (2% is fine)
1 to 2 Tablespoons room temperature butter for basting the top of the bread

Preheat the oven to 350f degrees.

Measure out into a large bowl the flour, sugar, baking soda, baking powder, salt, and dried cultured buttermilk (optional). Whisk dry ingredients thoroughly. Whisk the fine-chopped nuts into the dry ingredients. Set aside.

Stir the eggs into the mashed bananas and then stir in the lemon juice. Stir the banana-egg-lemon mixture into the dry ingredients. Stir in the butter. Pour in and stir the milk until thoroughly incorporated (about 30 strokes). Do not overmix.


Pour all the batter into one pan if using a large loaf pan (the batter should reach to about 2/3 full if it’s all going into one pan) or two smaller pans. Place in oven and bake for about 75 minutes, if using larger bread pan. For the smaller pans, bake for about 65 minutes. Since oven differences can impact the baking time, check on your cakes beforehand. The banana bread will be done when it is somewhat cracked on top, the sides pull away slightly from the edges, a toothpick tests shows clean, the bread springs back a bit when gently pressed at the top center point and the internal temperature reaches about 210 degrees.

Cool the bread for 10 minutes in the pan before brushing the top of the bread with the remaining butter. Serve bread warm from the oven or after a one-day (or more) counter sitting time.