Friday, June 21, 2013

going cajun'n creole.


one thing that i haven't really tried is crawfish. it was just one of those things that my mom never made so it never got on the menu. so, while i was walking down my nearest vietnamese market today after work, i stopped by the fish aisle to take a gander...

lo and behold...crawfish was on sale!

i looked at those tiny little buggers and thought what i could possibly make with them. then i thought of an etouffe recipe i saw a while back and though...eh. why not? i figured i'd make it work with a live crawfish so i gathered about a pound of them suckers and went home to ponder how i was going cook them.

when i got home though, the game plan changed as i got a little lazy and didn't want to dig out my bag of flour from the topmost shelf. what to do? i hopped onto google and searched for a simple crawfish recipe. what popped up and caught my eye was this little recipe that seemed super easy. so i went to work and i am soooooo glad that i made this! the sauce was just amazing and the seasoning was perfect! savory, with a little kick from the cayenne. i modified the recipe a bit but damn...was it good!

next time...going to make this with shrimp!!


Crawfish Cardinale
(from Grill a Chef)

1 lb. of crawfish tails (i used live crawfish so there was considerably less meat, haha. i recommend what he put. :D)
2 tbsps, cajun seasoning**

2 oz. (1/2 a stick) of butter (since it was just me, i used about 3 tbsps)
1 bunch of scallions, roughly chopped
3 tbsps tomato paste
1 cup heavy cream (didn't have any. used creme fraiche instead, about 2 tbsp, some silk vanilla *yikes, i thought it was regular!* coconut milk and used water to thin it out.)
3 tbsps cognac (i used Courvoisier Cognac VSOP.)
3 tbsps fresh parsley, chopped (i used italian parsley.)

1. Season the crawfish tails with salt and the cajun seasoning. Set aside. (obviously i skipped this step, lol. :D)

2. Heat large skillet over medium heat. Melt the butter and add the scallions to cook. Stirring occasionally.(i used the first 2 tbsp of butter for this part)

3. Once they are slightly softened and translucent, after 3-5 minutes, add the cream, cognac, and tomato paste (also threw in the cajun seasoning here and added water so it was a little thin). Bring this to a simmer and reduce until thick. (by about 2/3's), this will take around five minutes.

4. Dump in the crawfish and simmer just enough to warm them well (dumped the live crawfish here so it took about 7-10 min(?) for them to fully cook then a little bit more to make the sauce nice and thick. added the last tbsp of butter right here too). Toss in the chopped parsley and serve with nice french bread or over pasta. (i had it with whole wheat crackers. :) but crusty bread is the best way to go!)

**author's note: You could use something like Paul Prudhomme's Blackening Seasoning, which I love. OR you could make some yourself.:

 
Cajun'n Creole Seasoning

1 tsp paprika
1 tsp garlic powder
1 tsp onion powder
1/2 tsp ground cayenne pepper
2 tsp black pepper
1/2 tsp dried thyme
1/2 tsp dried oregano

Simply mix the ingredients well and store in a dark, dry, cool place. (i eye-balled this part since it was just a small portion. also, added a bit of Homestead Seasoning from my local spice shop.)

Note that this is pretty much the same as blackening seasoning. However, there is no salt in this mixture, I like to leave the salt levels up to the cook. If you wanted to sub this into other recipes for store bought mixes you would have to add 2 tsps salt. (i was frugal with the salt. there's a lot of things going on here and i wasn't sure if it was goibng to be too salty. i added barely 1/8 of a tsp of kosher salt right when i put in the crawfish.)

Tuesday, April 16, 2013

honey, you're so sweet.


i like bread. i really do. in fact, i'm going to go ahead and say that i *love* bread. If carbs didn't have to love me back on my thighs, arms, and face, i'd eat it every day with possible everything. but alas, bread is something that i have to eat in moderation...no more than a couple of slices a day. but sometimes i binge...oh, do i binge! like making bread every few days.

so when i find a cool recipe that i like, i tend to try it and see if i like what comes out. i especially like the easy recipes since i don't have a lot of time...like this one. the recipe's been around for a while but i'm pretty new to bread baking so it's exciting to find something that's relatively healthy and tasty.

i did end up making this dough twice though. the first try had lack-luster results when i baked it in a bread pan with a steam tray underneath. i really expected some hole-y bread! instead, it came out dense and deflated. urgh... i wanted to try again though, this time doing the dutch oven method with no fridge time and and it came out more holey (if not by much) and less flat. it did have a large spread while baking but i'm putting that down to the size of my pot. *sigh* try and try again...

Traditional American-Style Honey Whole Wheat Bread
(adapted from King Arthur Flour)

3 cups bread flour
1/2 cup whole wheat flour
1 1/2 tsp salt
2 1/4 tsp active dry yeast
2 tbsp vital wheat gluten
1/4 cup honey
1 1/2 or so cups warm water
olive oil

In a large bowl, combine flour, salt, and yeast, and vital what gluten. In a measuring cup, combine the warm water (about 100 degrees in temp) and honey. Add wet to dry and mix to create a shaggy dough. If the dough is too dry, add additional water little by little until the dough is no longer dry but still sticky and shaggy. Transfer to an oiled bowl, cover and let rise until doubled (about an hour). Prepare a sheet of parchment paper to use for the dough later on.

When doubled, knead the dough in the bowl for a couple of minutes then transfer to the parchment paper. Cover loosely with plastic wrap and let rise again until doubled (about 30 or so minutes).

Meanwhile, ready a cast iron pot with a lid in the oven on the middle rack and preheat to 450 degrees. Once the dough is ready and the oven is hot, carefully place the dough and parchment paper in the cast iron and cover immediately with the lid. Bake for 35 to 40 minutes. Reduce heat to 425 degrees, carefully remove the lid, and bake an additional 20 minutes until top is golden brown. Once done, transfer the bread to a cooling rack and cool completely before serving.

Tuesday, April 2, 2013

playing with chocolate.


such a grainy, blurry picture...*sigh*. another experiment with chocolate. this time in bread form! i had a bar of semi-sweet chocolate lying around and a bag of dried figs. what to do? bread of course! i also threw in some walnuts to add some texture. this not-so-sweet bread made for some interesting snackin's with fig spread, apples, and gouda... :)

Chocolate Walnut Fig Bread
(makes one large loaf)

3 cups bread flour
1/4 cup cocoa powder
1 1/2 or so cups warm water
3 tbsp sugar
2 tsp salt
2 tsp active dry yeast
1/2 cup semi-sweet chocolate, chopped
1/2 cup walnuts, toasted
1/2 cup soft dried figs, roughly chopped
olive oil

In a large bowl, combine flour, cocoa powder, sugar, salt, and yeast. Add the warm water (about 100 degrees in temp) and mix to create a shaggy dough. If the dough is too dry, add water little by little until the dough is no longer dry but still sticky and shaggy. Transfer to an oiled bowl, cover and let rise until doubled (about an hour). Prepare a sheet of parchment paper to use for the dough later on.

When doubled, add the chocolate, walnuts, and figs and knead the dough in the bowl just until the add-ins have been incorporated into the dough. Transfer to the parchment paper, cover and let rise again until doubled (about 30 minutes).

Meanwhile, ready a cast iron pot with a lid in the oven on the middle rack and preheat to 450 degrees. Once the dough is ready and the oven is hot, carefully place the dough and parchment paper in the cast iron and cover immediately with the lid. Bake for 35 to 40 minutes. Reduce heat to 425 degrees, carefully remove the lid, and bake an additional 20 minutes until top is golden brown. Once done, transfer the bread to a cooling rack and cool completely before serving.

Monday, April 1, 2013

chocolate and wine.


it's always interesting what kinds of things that can get combined in food. cookies with savory herbs. sweet apples with pork. chocolate and wine. i have to confess...the last one wasn't really a big hit with me. when i purchased a bottle on sale from my local world market, i really didn't like the taste. it was a little weird and not as chocolatey as i thought it was going to be. ialthough, i'm thinking it was the brand, not necessarily so much the taste.

why? because chocolate and wine in cake form is excellent! and because i could really decide how much chocolate i put in the finished product, i can end up with a decadent chocolate cake with red wine notes. :)

for this cake, i ended up using a travel bottle of confectioner's chocolate red wine that i had bought to taste (which was awesome, by the way) since i wasn't about to open a new bottle of merlot. i also added some cinnamon and ancho chile powder to give it a spice boost...and just because i can, lol. i'd have to play around with this recipe a little more as i ended up with a thick crust around the edges (too high a heat, i think)...but all in all, it was a super tasty treat!

Red Wine Chocolate Cake
(barely adapted from 17 and Baking)

1/2 cup unsalted butter, softened
1 cup firmly packed light brown sugar
1/2 cup granulated sugar
1 large egg, at room temperature
3/4 cup red wine (i used confectioner's chocolate red wine)
1/4 cup plain yogurt
1 tsp vanilla extract
1 1/2 cups all-purpose flour
3/4 cup Dutch cocoa powder (i used regular cocoa)
1/4 tsp baking soda
1/2 tsp baking powder
1/4 tsp salt
1 tsp cinnamon
1/2 tsp ancho chile powder

Preheat the oven to 325 F. Butter and flour a 9×5″ loaf pan.

Beat the butter on medium speed with an electric mixer until smooth. Add the sugars and cream until lightened and fluffy, about 3 minutes. Beat in the egg until well combined, then mix in the wine, yogurt, and vanilla. The batter might look curdled, but don’t worry. Sift in the flour, cocoa, baking soda, baking powder, and salt. Stir with a spoon until there are no streaks of flour left, scraping down the sides of the bowl and being careful not to over mix.

Scrape the batter into the loaf pan and bake 60-70 minutes, or until a thin knife inserted into the center of the loaf comes out clean. Cool the loaf in the pan on a rack for 10-15 minutes, then run a knife around the edges and turn it out.

the joy of cooking comically


The Joy of Cooking Comically

another awesome blog. stick figures, comics, cooking...all step-by-step and entertaining to boot! this makes me want to try his recipes just to see if he cooks as good as he draws, lol. 2am chili? yes please!

Tuesday, March 26, 2013

no-knead bread blog


No-Knead Bread Blog

man...I wish I saw this a few months ago when I really started getting into no-knead breads. what's awesome about this site is that it doesn't use any fancy cookeware (ie, dutch ovens, pizza stone, etc...) to make the bread. and plus it has different recipes for different no-knead breads and sandwich loaves. lol, if I ran into this site earlier, I could've saved myself $80!! definitely bookmarking this so I can try out some of the recipes! check out their "poor man's" way of the no-knead bread!

Tuesday, March 12, 2013

curry me home tonight.


i went to a farmer's market this weekend and got to taste some awesome local food. it's the last of the season for my favorite fruit, the fuji apples, and i was fortunate enough to get a handful of them. i'm hoping that there'll be some more next weekend as those apples were unbelievably sweet! another interesting thing i got to try was a raw kale salad from one of the organic/vegan food trucks. it was basically kale, grated raw sweet potato, flavored brown rice, and a curry dressing. i didn't really care for brown rice at the time so i basically just got a bunch of leaves, some shreds of potato, and the dressing for about six bucks. geez...talk about a rip off. :/

i can't really complain too much...i did opt out of the rice. but what made the purchase a little bit worth while was the awesome curry dressing that it had on it. i decided to try and replicate it, and snazzed up the kale to make it a little bit more interesting. i took ispiration from the raw project as a starting base. :)

 
Savory Curry Dressing
(makes approx 1 1/2 cup of dressing)

5 pieces of baby carrots
2-3 sprigs of flat leaf parsley
1-2 tsp curry powder (measure to taste)
1/4 tsp fresh ground pepper (i used a three pepper medley grinder, about 5 turns)
1/4 tsp onion powder
1-2 pinches of kosher salt
1/2-1 tsp minced ginger (measure to taste)
1 tsp honey
2 tsp tahini (i used joyvu brand)
2 tbsp plus 1 tsp lime juice (i used the bottled kind)
1 tbsp coconut oil
1/8 cup coconut milk (not canned)
1/4 cup olive oil

place all ingredients in a food processor/grinder and process until oils are well blended and the carrots are chopped fine. refrigerate for one hour before serving.

note: the dressing does get a bit thick in the fridge. let stand at room temperature for about thirty minutes before serving. you could probably serve this a little bit warm too! :D

and the verdict? damn good, if i say so myself. i like the curry taste a little stronger so i went with the full two teaspoons. it was exactly what i was looking for. and the kale salad mix was definitely more to my liking. it was basically just a whole single bunch of kale, chopped up. then i added an entire package of pre-made broccoli slaw and some left over romain that was getting close to the core. crunchy and lots of interesting texture. i do find, tho, that the kale has to soak the dressing first so that it'll soften it up a bit. and that a little dressing goes a long way.

oh, and that yogurt and lime DO NOT MIX. yeas, i know it would curdle, but i didn't think about it while i was in my "mad scientist" mode. although, right before it curdled, the taste of it was awesome! next time (if i wanted a yogurt based dressing) i'd take out the tahini and lime juice, sub half a cup of honey greek yogurt, and see what that tastes like. yay for healthy salads!

Sunday, March 3, 2013

onion time!


one vegetable that i really enjoy is the onion. onion, to me, reminds me of when i was a kid and how my mom would use to put it in all of her cooking. eggs? add some onion. sardines? add some onion. fish, poultry, meat, veggies...you name it, it had onion in it. later on, i'd grow to love all the other onion varieties i hadn't had before and pretty soon i was hooked. whenever i make sandwiches, you'd probably find a butt load of these strong tasting vegetable inside. oh, and did i mention i love onion soup??


which leads me to the bread i made today. i was hankering for something oniony and i spied my pile of onions. since i was on a bread schtick, i thought i'd made some onion bread! i had some asparagus too, so i threw some in. :) this is definitely a savoury bread that packs a dallop of flavor. very intensley oniony, a subtle taste of asparagus, and then followed by a hit of garlic. the apartment smelled amazing as this was baking and when i cut off a slice, it was exactly what i was hoping for. fantastically flavorful! i made some sandwiches from this and i was in heaven!


one thing i have to say though, i'd probably cut down on the onion, next time. originally i put in a whole onion and a half(!) in it. that's not to say that it was too much...it just made some parts of the bread a little wetter than i wanted it to be. how to fix it? i popped it in the toaster, of course! made for a chewy and crispity-crunchety munch of happiness in my mouth! also, i thought i could maybe "braid" the bread so that it would be nice and pretty, but the dough was too wet when i put it together so that was a bust. i had to mix the whole thing together and let it sit again so it'd rise properly. *sigh* other than that, i totally need to make this again!

i rewrote the original recipe so the one below is made with all the adjustments in ingredients/methods from this test run. when i make it next time...it'll be awesomely perrrfffffect! >:D


No-Knead Caramelized Onion, Asparagus, and Garlic Bread

1 1/2 cups warm water plus more if needed
2 cup all-purpose flour*
1 1/4 bread flour flour*
2 tsp salt
1/4 tsp fresh ground pepper
1/2 tsp sugar
1/2 tsp granulated roasted garlic or 4-6 garlic cloves minced to a paste
2 1/2 tsp granulated yeast
1 tsp sugar plus more to caramelize onions
1 medium onion, sliced
1/2 bunch of asparagus, cut into half inch pieces
cornmeal for dusting

*i ran out of bread flour, lol. sub all flour as either all-purpose or bread flour. :)

in a pan, caramelize onions with a little sugar until almost done. take asparagus and a little bit of the garlic and cook with the onion (season at this point with just a little salt and peper if you want) until onions are completely caramelized and the asparagus is tender. set aside to cool.

meanwhile, mix flour(s) salt, pepper, sugar, garlic, and yeast together until combined. then add the asparagus and onion mixture and the warm water to make a wet dough. if it's too dry, add some more water little by little until you get a shaggy dough. let rise for about 2-5 hours minimum or leave on a warm area, covered, overnight.


to bake, preheat the oven to 450 degrees with your dutch oven and lid inside. prepare a parchment paper with scattered cornmeal. with greased hands, take the risen dough and make a ball then place the rounded dough on prepared parchment. let rest, loosely covered with saran wrap, until your oven is hot (about 20-30 minutes). once the oven is hot, take your dough with the parchment paper and carefully place it in the dutch oven and bake, covered, for 30 minutes. remove lid and bake an additional 15-30 minutes or until top is golden brown. let cool 15 minutes before serving.

makes one loaf.

Sunday, February 24, 2013

bountiful bread.

i've been on a bread shtick lately and i've been pinning bread like a mad woman for all the interesting breads that i could find and wanted to try. a really big interest, it seems, is the no-knead bread variety. i really like how easy it is and the results are fairly tasty. I'm a huge fan of artisan bread but buying it can get a little pricey. It's nice to be able to just whip up a batch and bake it the next day.

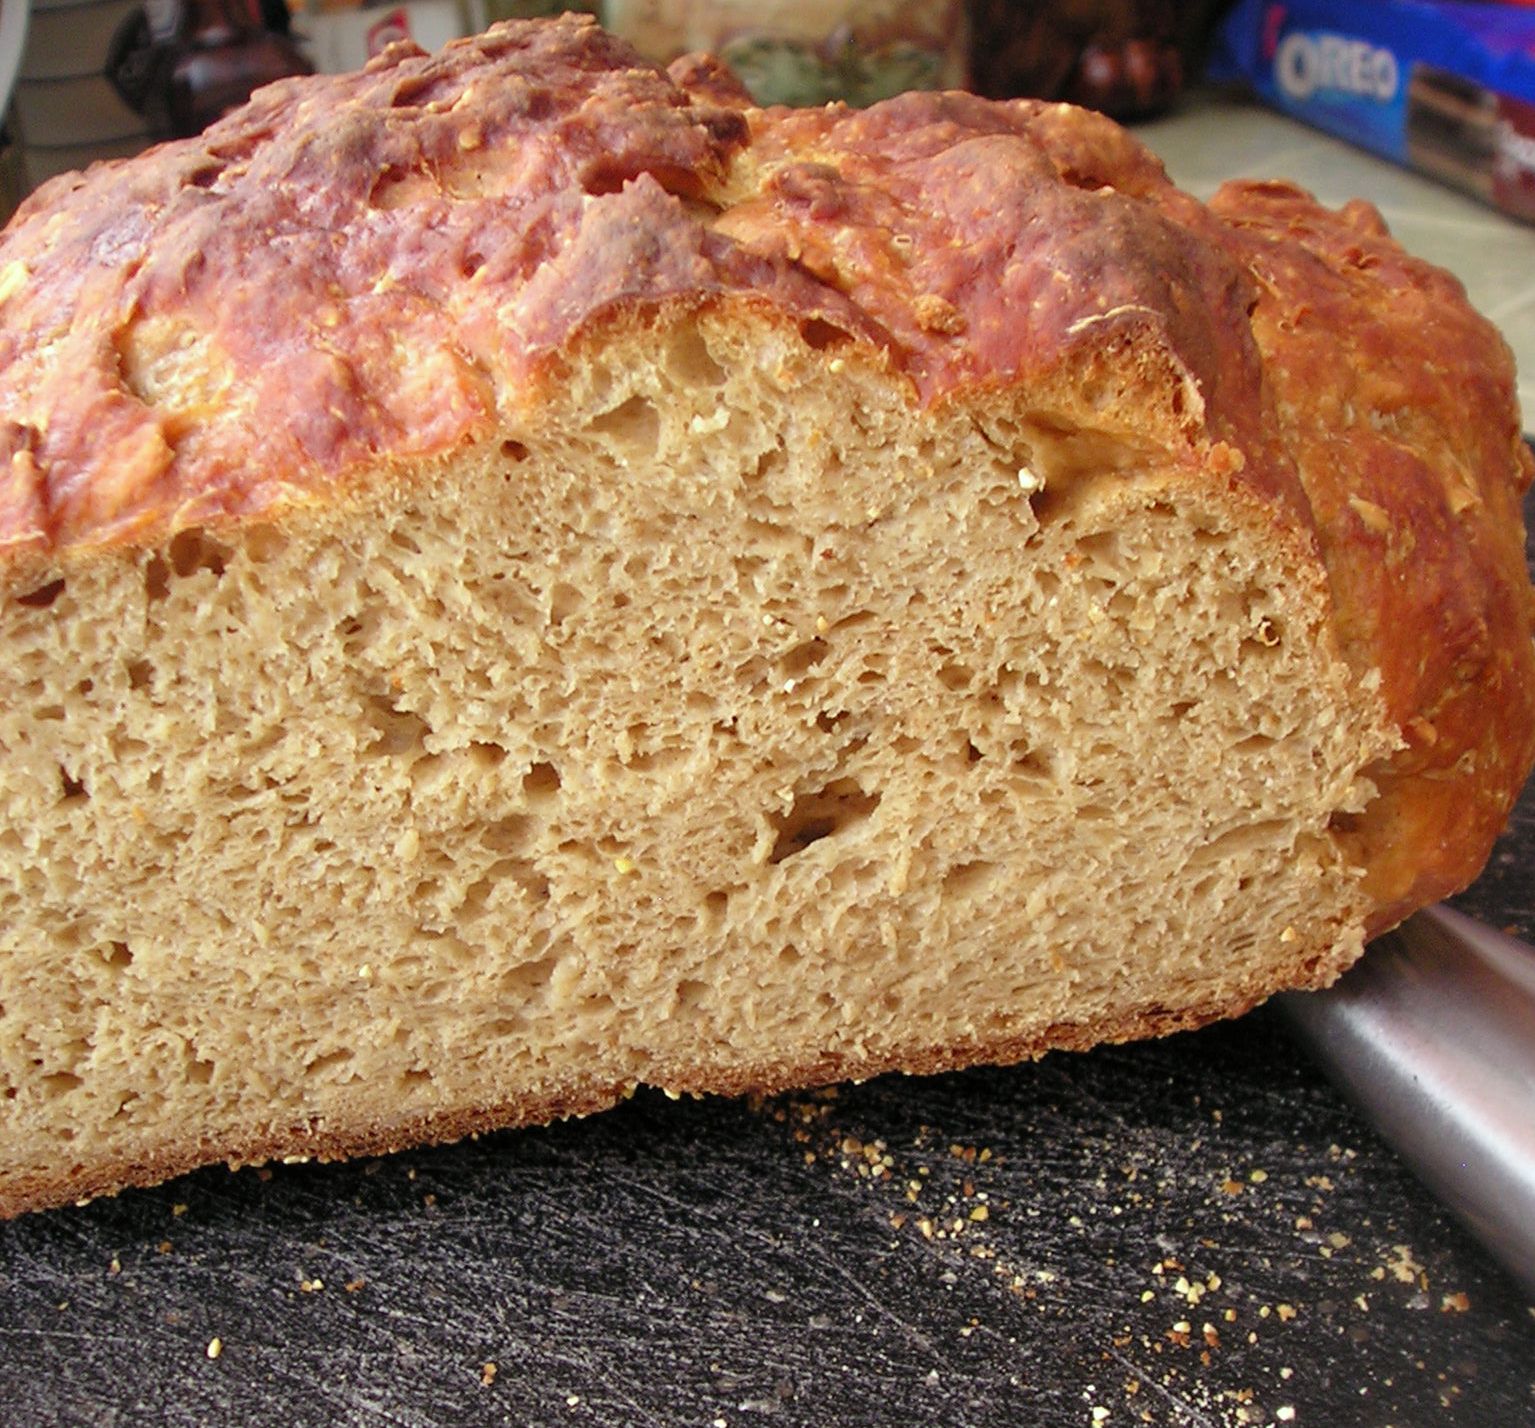
so, with that being said, the boyfriend and i are moving out of our apartment in a couple of months and i'm finding that i have to get rid of some miscellaneous pantry items i've hoarded for a "rainy day". dried fruit, random flours, oatmeal, nuts, and spices galore...it's almost kind of random except they've been collected for specific recipes on my to-do list. but now that i won't have the luxury of taking my time to make them, i'm finding that using the stuff in my pantry to make bread is actually a more attractive idea than tossing/giving away my ingredients. and no-knead bread is a perfect base for tossing things together and crossing my fingers that they'll be a good combination! for this experiment, i went on a whim and used buttermilk powder, flaxseed meal, and oats for a "grainy" kind of bread. here's the recipe:

 
No-Knead Buttermilk Flax Oat Bread

2 cups warm water plus more if needed
2 1/4 cups bread flour
1 cup flaxseed meal flour
2 tbls powdered buttermilk
1/3 to 1/2 cup old fashioned oats
2 tsp salt
1 (1/4 oz.) packet or 2 1/2 tsp granulated yeast
cornmeal for dusting

mix all dry ingredients together then add the warm water to make a wet dough. if dry, add water until you get a shaggy dough. let rise for about 2-5 hours minimum or leave on a warm area, covered, overnight. to bake, take the dough and make a ball. on a parchment paper, scatter the cornmeal and place the rounded dough on it then let rest. preheat the oven to 450 degrees with your dutch oven and lid inside for about 20 minutes. once hot, take your dough with the parchment paper and carefully place it in the dutch oven and bake, covered, for thirty minutes. remove lid and bake an additional 15 minutes or until golden brown. let cool 15 minutes before serving.

makes one loaf.

the verdict? it's definitely softer than my previous no-knead breads that i've made. it's still got that tangy-ness that's typical with this type of bread and it doesn't really taste all that different...well, maybe not so sour. there isn't a lot of openness to the crumb and after baking it didn't really expand like i though it was going to. maybe i just didn't let it rise enough (i baked it at the minimum rise time) or maybe it's the flaxseed meal? whatever it is, it is awesome re-toasted with some butter. i'd consider this a success! :)

Saturday, February 16, 2013

parfaits.


so what happens when you want to make a tiramisu but don't want to actually do the work of whipping and/or cooking the eggs? you make a parfait of course! this one was one of the firsts. since then, i've tweaked the recipe so that i can use pretty much any and all ingredients that i want to throw in there. and the bonus? it's all made of almost fat free or nonfat ingredients! yeah! sometimes i love experiments that fail. :)


Anything-Goes Parfait

ladyfinger cookies
fat free cream cheese
sweetener of choice
add-ins of choice
liquor or drink of choice
fat free whipped cream

1. get fat free cream cheese, sweetener of choice, and/or add-ins and whip together. (for these oreo ones, i used a couple crumbled chocolate oreos and equal just to get it sweet enough to taste). put aside in the fridge for use later.

2. take the whipped cream and add your sweetener of choice (totally optional. i have a sweet tooth so i added just a tad of equal to make it sweeter. for this i just stirred it in, it'll set slightly when everything gets chilled together).

3. take two lady fingers and soak them in the liquor of choice (i used just barely a teaspoon each of pre-mixed mudslide mix watered down with a little bit of fat free chocolate milk). soak cookies just enough to be slightly soft but not soggy.

4. put everything together. start with the lady fingers (broken in half and placed on the bottom of your glass, tumbler, what-have-you...), then put a layer of the cream cheese mixture. add a layer of whipped cream then crumble some oreo on top. repeat until you reach the top of the glass ending with the crumbled oreos. cover with plastic wrap (or lid, if it's a jar) and let chill overnight. unwrap and serve!