Saturday, February 16, 2013

parfaits.


so what happens when you want to make a tiramisu but don't want to actually do the work of whipping and/or cooking the eggs? you make a parfait of course! this one was one of the firsts. since then, i've tweaked the recipe so that i can use pretty much any and all ingredients that i want to throw in there. and the bonus? it's all made of almost fat free or nonfat ingredients! yeah! sometimes i love experiments that fail. :)


Anything-Goes Parfait

ladyfinger cookies
fat free cream cheese
sweetener of choice
add-ins of choice
liquor or drink of choice
fat free whipped cream

1. get fat free cream cheese, sweetener of choice, and/or add-ins and whip together. (for these oreo ones, i used a couple crumbled chocolate oreos and equal just to get it sweet enough to taste). put aside in the fridge for use later.

2. take the whipped cream and add your sweetener of choice (totally optional. i have a sweet tooth so i added just a tad of equal to make it sweeter. for this i just stirred it in, it'll set slightly when everything gets chilled together).

3. take two lady fingers and soak them in the liquor of choice (i used just barely a teaspoon each of pre-mixed mudslide mix watered down with a little bit of fat free chocolate milk). soak cookies just enough to be slightly soft but not soggy.

4. put everything together. start with the lady fingers (broken in half and placed on the bottom of your glass, tumbler, what-have-you...), then put a layer of the cream cheese mixture. add a layer of whipped cream then crumble some oreo on top. repeat until you reach the top of the glass ending with the crumbled oreos. cover with plastic wrap (or lid, if it's a jar) and let chill overnight. unwrap and serve!

Friday, January 11, 2013

recipe in pictures: tailgate chili


chili. one of those things that i can cross off the to-do list. picked this recipe to try and added in some homemade ham my mom gave me. the verdict? interesting. boyfriend liked it...i thought it was okay. with the ham added in, it was definitely not your typical chili taste. i'll probably try to do this again but with a different recipe. now on to the show!


Healthier Boilermaker Tailgate Chili
(from All Recipes)

2 pounds extra-lean ground beef
1 pound Italian chicken sausage, diced
3 (15 ounce) cans chili beans, drained
1 (15 ounce) can chili beans in spicy sauce
2 (28 ounce) cans diced tomatoes with juice
1 (6 ounce) can tomato paste
1 large yellow onion, chopped
3 stalks celery, chopped
1 green bell pepper, seeded and chopped
1 red bell pepper, seeded and chopped
2 green chile peppers, seeded and chopped
1/2 cup beer
1/4 cup chili powder
1 tbsp Worcestershire sauce
1 tbsp minced garlic
1 tbsp dried oregano
2 tsp ground cumin
2 tsp hot pepper sauce (such as Tabasco®)
1 tsp dried basil
1 tsp salt
1 tsp ground black pepper
1 tsp cayenne pepper
1 tsp paprika
1 tsp white sugar
3 cups baked tortilla chips

1. Crumble ground beef and chicken sausage into a large stock pot over medium-high heat; cook and stir until evenly browned, 10 to 12 minutes. Drain excess grease.

2. Pour in chili beans, spicy chili beans, diced tomatoes, and tomato paste. Add onion, celery, green bell pepper, red bell pepper, chile peppers, and beer. Season with chili powder, Worcestershire sauce, garlic, oregano, cumin, hot pepper sauce, basil, salt, ground pepper, cayenne, paprika, and sugar. Stir to blend, then cover and simmer over low heat, stirring occasionally, for at least 2 hours.

3. Taste and adjust salt, ground pepper, and chili powder in necessary, after 2 hours. Ladle into bowls and top with baked tortilla chips to serve.

Saturday, December 29, 2012

hummus say, sir...i'm in love!


more hummus love. must be going on a hummus shtick or something...can't get enough of the stuff especially since i know how easy it is to make it!! this time around i followed (very loosely) this recipe for sumac and smoked paprika hummus. well, since i like my hummus very bold in flavoring, the sumac and the paprika got upped a bit to get that taste that was floating around in my head. conclusion? this was very, very good. mmmmm.....


Sumac Paprika Hummus
(adapted from Frugal By Choice)

2 cans garbanzo beans/chickpeas
5 cloves of garlic or 2 tbs garlic minced to a paste
juice of 1 lemon or lime
1 tsp kosher salt
1/4 cup olive oil
1/4 cup tahini (i like mid-east tahini)
2 tbs of smoked paprika, plus more for sprinkling on top
1/2 tsp of sumac, plus more for sprinkling on top
dried parsley

drain garbanzo beans a reserve half a cup of liquid. in a food processor or blender, add all the ingredients exept the olive oil and blend until mixed. after a minute or so, drizzle the olive oil in with the machine is still going. add a bit of the reserved liquid if needed. once the hummus is super smooth, stop the machine and adjust seasoning to taste. when done, put hummus in a tupperware container and drizzle with additional olive oil with a sprinkle of paprika, sumac, and dried parsley on top. place in fridge for about an hour to let the flavors develop and serve with pita chips or veggies!

makes about 1 1/2 to 2 cups of hummus.

no-knead to worry, deux.


the second time that i used the batter, the bread didn't rise as high as it did the first time. i don't know if it's because my fridge is wonky or if it's just the ingredients that i used, but after leaving it out for about 45 minutes before baking it in the oven, there wasn't a very visible rise to the dough.

this time around, i added some oats to the top and after a split minute decision, brushed the top of the bread with butter after i took it out of the oven. it was buttery and delicious, and tasted exactly like the first test loaf i made a few days earlier. i was very happy with the results despite the lack of rise in the dough.

after about six or seven days (the max amount the bread was supposed to stay in the fridge), i took out the rest of the dough and baked it as i did the two loaves. this one had a more noticeable rise (although not as much as the first one did). it didn't taste as sour as i thought it was going to be...which was good considering i wasn't looking to make a sourdough bread. i topped this one with oats and a little bit of flax seed. i opted out the butter this time around. all in all, i thought this was a great experience for being a first time bread maker. next time, we'll see what actual kneading does! :D

Sunday, December 2, 2012

no-knead to worry.


in an effort to start getting rid of things in my pantry, i decided to try my hand at making bread. i don't know what it was, but i was always intimidated with the idea of making bread. maybe it was the prep work..or maybe the kneading...whatever it was, i've always put it on the back burner of my cooking to-do list. today, though, i decided...what the hell. :)

gathering the ingredients was a pinch. i basically had everything in my pantry already: yeast, bread flour, kosher salt, and water. i decided to use this recipe for a no-knead bread (further postponing the kneading part in the process). i've been looking at different blogs and it seems like this kind is the easiest introduction to bread-making for beginners. just what i was looking for. :D

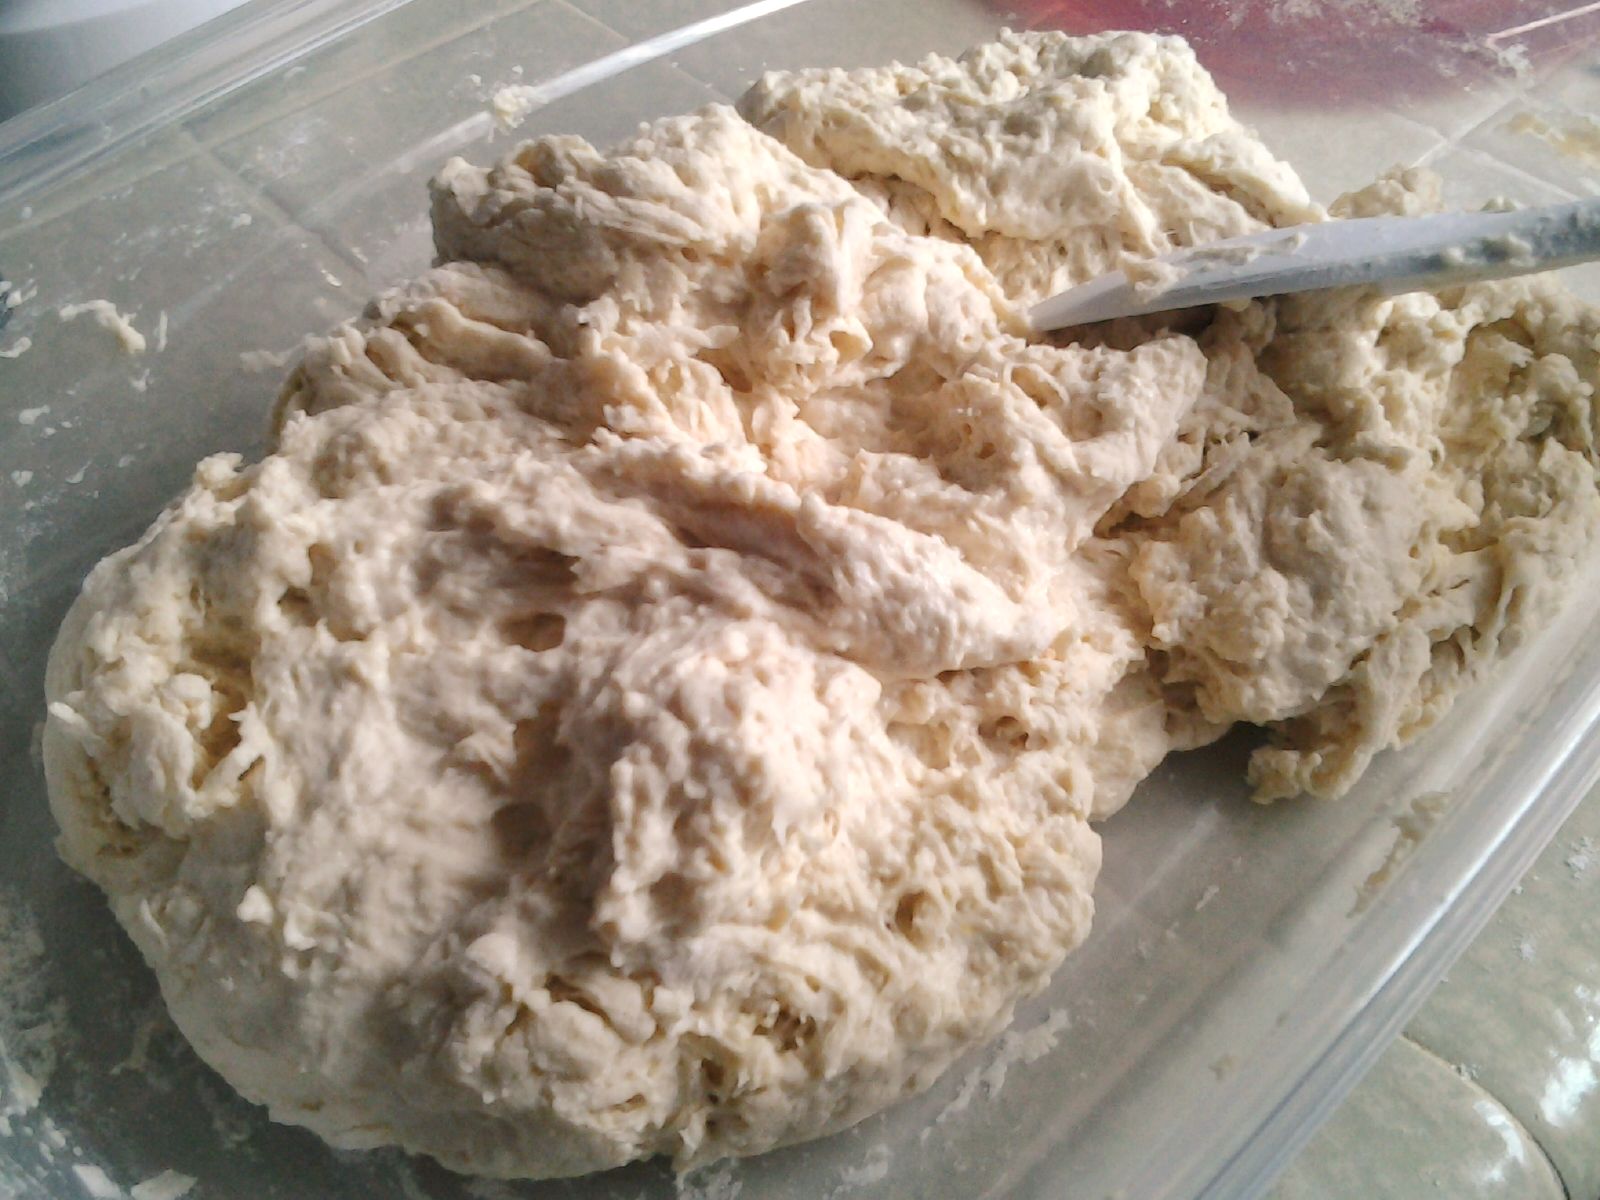
mixing the ingredients up and getting it to the rising stage was also surprisingly easy. since the recipe really only calls for four ingredients, all i had to do was put everything in a pot and mix it. i let the dough rise for about three hours and it significantly tripled in size by the end of the waiting period. i stuck the whole thing in the fridge to chill and decided to do a small test loaf to see what it tasted like.

what you end up having is a bread with a super crunchy (that kind that you can knock on) and a soft, chewy inside. the bread itself tasted slightly like sourdough. and according to the recipe, that taste will only intensify the longer i leave it in the fridge. all in all, i'm glad that i was finally able to tackle bread-making. so super easy...i wonder what the heck i was afraid of all this time?? :/

 
Master Dough
(from Artisan Bread in Five Minutes a Day)

3 cups lukewarm water
(you can use cold water, but it will take the dough longer to rise. Just don’t use hot water or you may kill the yeast)

1 tablespoon granulated yeast
(you can use any kind of yeast including: instant, rapid rise, bread machine, active dry or cake yeast*. I buy the 2-pound bulk package of Red Star Yeast to drive down the cost. You can also decrease the amount of yeast in the recipe by following the directions here. Or you can bake with a sour dough starter, see instructions here.) *If you use cake yeast you will need 1.3 ounces.

1 to 1 1/2 tablespoons Morton Kosher Salt
(adjust to suit your taste or eliminate it all together. Find more information here)

6 1/2 cups (2-pounds) all-purpose flour
(we tested the recipes with Gold Medal flour. If you use a higher protein flour check here)

Mixing the dough:
In a 5 or 6 quart bowl or lidded Food Storage Container, dump in the water and add the yeast and salt. Because we are mixing in the flour so quickly it doesn’t matter that the salt and yeast are thrown in together. (If you are using the fresh cake yeast break it up like I did.)

Dump in the flour all at once and stir with a long handled wooden spoon or a Danish Dough Whisk, which is one of the tools that makes the job so much easier! Stir it until all of the flour is incorporated into the dough, as you can see it will be a wet rough dough.

Put the lid on the container, but do not snap it shut. You want the gases from the yeast to escape. (I had my husband put a little hole in the top of the lids so that I could close the lids and still allow the gases to get out. As you can see it doesn’t take much of a hole to accomplish this.)

Allow the dough to sit at room temperature for about 2 hours to rise. When you first mix the dough it will not occupy much of the container. But, after the initial 2 hour rise it will pretty much fill it. (If you have decreased the yeast you will have to let it go longer than 2 hours.) DO NOT PUNCH DOWN THE DOUGH! Just let it settle by itself.

The dough will be flat on the top and some of the bubbles may even appear to be popping. (If you intend to refrigerate the dough after this stage it can be placed in the refrigerator even if the dough is not perfectly flat. The yeast will continue to work even in the refrigerator.) The dough can be used right after the initial 2 hour rise, but it is much easier to handle when it is chilled. It is intended for refrigeration and use over the next two weeks, ready for you anytime. The flavor will deepen over that time, developing sourdough characteristics.

Baking the dough:
The next day when you pull the dough out of the refrigerator you will notice that it has collapsed and this is totally normal for our dough. It will never rise up again in the container.

Dust the surface of the dough with a little flour, just enough to prevent it from sticking to your hands when you reach in to pull a piece out. You should notice that the dough has a lot of stretch once it has rested. (If your dough breaks off instead of stretching like this your dough is probably too dry and you can just add a few tablespoons of water and let it sit again until the dough absorbs the additional water.)

Cut off a 1-pound piece of dough using kitchen shears* and form it into a ball. For instructions on how to form the ball watch one of our videos. Place the ball on a sheet of parchment paper… (or rest it on a generous layer of corn meal on top of a pizza peel.) *I actually use a pair of Sewing Shears because I like the long blade. I just dedicated a pair to the kitchen.

Let the dough rest for at least 40 minutes, (although letting it go 60 or even 90 minutes will give you a more open hole structure in the interior of the loaf. This may also improve the look of your loaf and prevent it from splitting on the bottom.) You will notice that the loaf does not rise much during this rest, in fact it may just spread sideways, this is normal for our dough. You can also try our “refrigerator rise trick,” shaping the loaves and then immediately refrigerating them overnight. By morning, they’ll have risen and are ready for the oven after a brief room-temp rest while the oven preheats (click for instructions).

Preheat the oven to 450 degrees with a Baking Stone* on the center rack, with a metal broiler tray on the bottom (never use a glass vessel for this or it will shatter), which will be used to produce steam. (The tray needs to be at least 4 or 5 inches away from your stone to prevent it from cracking...or Cast Iron Pizza Pan- which will never crack and conducts heat really well. Be careful to dry it after rinsing with water or it will rust)

Cut the loaf with 1/4-inch slashes using a serrated knife. (If your slashes are too shallow you will end up with an oddly shaped loaf and also prevent it from splitting on the bottom.)

Slide the loaf into the oven onto the preheated stone (the one I’m using is the cast iron) and add a cup of hot water to the broiler tray. Bake the bread for 30-35 minutes or until a deep brown color. As the bread bakes you should notice a nice oven spring in the dough. This is where the dough rises. To insure that you get the best results it is crucial to have an Oven Thermometer to make sure your oven is accurate.

If you used parchment paper you will want to remove it after about 20-25 minutes to crisp up the bottom crust. Continue baking the loaf directly on the stone for the last 5-10 minutes.

Allow the loaf to cool on a rack until it is room temperature. If you cut into a loaf before it is cooled you will have a tough crust and a gummy interior. It is hard to wait, but you will be happy you did! Make sure you have a nice sharp Bread Knife that will not crush the bread as you cut. Or you can tear it apart as they do in most of Europe.

If you have any leftover bread just let it sit, uncovered on the cutting board or counter with the cut side down. If you cover a bread that has a crust it will get soggy.

Tuesday, November 27, 2012

cool cookies.


surprisingly, the two bags of toffee chips i had bought a few months back were still in the pantry waiting to be used. i had a grandeur idea that i was going to go on a baking spree and give out cookies like crazy. needless to say i'm just now getting the baking itch and did a batch of chocolate peanut butter cookies...


...and also two tea flavored shortbreads to go along with. earl gray and matcha green tea.


cookies ready to bake. mmmm....


Brickle Drop Cookies
(from Hershey's Kitchens)

1 cup light brown sugar
2 teaspoons cream of tartar
1 teaspoon vanilla extract
3-1/2 cups all-purpose flour
1 cup granulated sugar
1 cup butter or margarine
3 eggs
1-1/3 cups HEATH BITS 'O BRICKLE Toffee Bits
1/2 teaspoon salt
2 teaspoons baking soda

1. Heat oven to 350°F. Lightly grease cookie sheet or line with parchment paper.

2. Beat butter, granulated sugar, brown sugar, vanilla and salt in large bowl until blended. Add eggs; beat well. Stir together flour, baking soda and cream of tartar; gradually add to butter mixture, beating until blended. Stir in toffee bits. Drop by heaping teaspoons onto prepared cookie sheet.

3. Bake 8 to 10 minutes or until lightly browned. Cool slightly; remove to wire rack. Cool completely. Makes about 6 dozen cookies.

 
Chocolate Peanut Butter Cookies
(from Hershey's Kitchens)

2 eggs
2 cups all-purpose flour
1/2 cup HERSHEY'S Cocoa
1 teaspoon baking soda
2 teaspoons vanilla extract
1/2 teaspoon salt
3/4 cup light brown sugar
1 cup butter
1 cup granulated sugar
1(10-oz.) package REESE'S Peanut Butter Chips

1. Heat oven to 375°F.

2. Beat butter, granulated sugar, brown sugar, vanilla and salt in large bowl until creamy. Add eggs; beat well.

3. Stir together flour, cocoa and baking soda; add in peanut butter chips; gradually add to butter mixture, beating until well blended. Drop by rounded teaspoons onto ungreased cookie sheet.

4. Bake 8 to 10 minutes or until set. Cool slightly; remove from cookie sheet to wire rack. Cool completely. Makes about 5 dozen cookies.


baked tea cookies. more buttery than tea...must fix somehow. hmmmm....

Earl Grey Shortbread Cookies
(from Food Network)

2 cups all-purpose flour
2 tablespoons loose Earl Grey tea leaves
1/2 teaspoon salt
3/4 cup confectioners' sugar
1 teaspoon pure vanilla extract
1 cup (2 sticks) butter, room temperature

In a food processor, pulse together the flour, tea, and salt, until the tea is just spotted throughout the flour. Add the confectioners' sugar, vanilla, and butter. Pulse together just until a dough is formed. Place dough on a sheet of plastic wrap, and roll into a log, about 2 1/2-inches in diameter. Tightly twist each end of wrap, and chill in refrigerator for 30 minutes.

Preheat oven to 375 degrees F.

Slice the log into 1/3-inch thick disks. Place on parchment or silpat lined baking sheets, 2 inches apart (2 probably needed depending on size of sheets). Bake until the edges are just brown, about 12 minutes. Let cool on sheets for 5 minutes, then transfer to wire racks and cool to room temperature.

Monday, November 26, 2012

hummus be joking!


hummus! so easy to do...took me less than five minutes to make and now i have two weeks worth out of two cans of beans. used this recipe as a base. i didn't really follow it though. considering i just used whatever i had in the pantry, i ended up mixing garbanzo and cannellini so it's a mixed bean hummus. not wanting it plain, i added some tuscany blend spice i bought from san francisco as well as hungarian smoked paprika. the result? deliciousness.

 
Smokey Tuscun Hummus
(adapted from Simply Recipes)

2 garlic cloves, mashed and then minced (used garlic paste, about 1 tsp)
1 (15.oz) can garbanzo beans (chickpeas), drained and rinsed with half can liquid reserved
1 (15.oz) can cannellini beans, drained and rinsed
1/3 cup of tahini (roasted, not raw)
1/3 cup freshly squeezed lemon juice (or use lime juice instead)
1/4 cup olive oil
1/2 tsp of salt or more to taste
1 1/2 tbsp tuscany blend spice
1 to 2 tsp hungarian smoked paprika
Pine nuts (toasted) and parsley (chopped) for garnish
water, if needed

1. In a food processor, combine the garlic, garbanzo beans, tahini, lemon juice, 1/2 cup water, and olive oil. Process until smooth. Add salt, starting at a half a teaspoon, to taste. (skipped this and used the blender method. use water to thin out the hummus if too thick while blending.)

2. Spoon into serving dish and sprinkle with toasted pine nuts and chopped parsley (and also additional smoked paprika).

Makes about 3 cups.

Tuesday, November 20, 2012

thirsty.


infused waters. need to stock up on these and just put them in the fridge. :/

Monday, November 12, 2012

corned...beef.

so, the corned beef experiment didn't turn out as well as i had hoped. the baked recipe that i used turned out to be much too sweet for my taste (which was a shame, it sounded good). The texture was there, but the taste was just too confusing on the palate. Next time, it would definitely be boiled in the traditional way (i roasted the whole brisket instead of doing half and half). The cabbage that i sauteed with it will also be boiled (and less salted). The only thing that probably turned out well was the colcannon (which in itself is kinda hard to fuck up, lol). ah well...practice makes perfect.

Friday, November 9, 2012

mcguire’s irish pub reuben chowder.


was browsing through the internet to add things to my soups, stews, and gravies section on pinterest and ran across this rueben chowder recipe and thought, "ooh! i can make that with leftover corned beef!" yaay for more corned beef recipes!

 
Jean's Favorite Reuben Chowder
(from Martie Knows Parties)

For the Roux:
1 lb butter
2 cups flour
1 cup celery, finely diced
1 cup green onion, finely diced

2 gallons milk
4 quarts heavy cream
½ cup chicken base
½ cup ham base
1/3 cup caraway seeds
1 cup sauerkraut
2 lbs corned beef brisket
Salt and pepper to taste
2 lbs potatoes

 
Melt butter. Sweat onions and celery until tender. Stir in flour. Cook the roux for three to five minutes and then add the rest of the ingredients except the potatoes. Stir frequently to keep from sticking. Meanwhile, steam the potatoes separately. Add to chowder after it thickens then serve.