
This year's Thanksgiving turned out waaaaaay less stressful than last year's over-achievement. I had written just a little blurb of what happened, but in reality, I was freaking out about how much to feed six people. Although that's really not something to panic about, I was really unsure of how much food to prepare since I had a skewed sense of portioning: during Thanksgiving, my parents make at LEAST seven dishes to feed their moderate family of SIX.
Turkey, bourbon ham, lumpia, rice, stuffing, meatballs . . . it was a labor of love that my mom and dad always looked forward to indulging during this time of year. What did that translate to? Feasting for days, of course! But when I applied that to last years cooking, I found people hardly ate at all. To my disappointment, my guests were too drunk to even enjoy (or appreciate) the veggie and cracker platter I put together for them to snack on.
On times like these, I miss my friends in San Diego. *sigh* I could always count on them to not only imbibe, but also to feast!
So this year, I decided that MY turkey day was going to focus on AFTER entertainment was over. I made food that me and the hubby were going to enjoy afterwards and didn't really care who was coming to dinner. . .


And wouldn't you know it . . . if the people from last year were too drunk to eat, these people were too full to eat! What the HECK!?! I never really understood why people eat before going to someone else's house to EAT. Isn't that the point of going to dinner? To EAT?! I was irked when the people we invited finally left . . . The point of making so much food was in order for them to enjoy it and they didn't even eat at all.
Ugh . . . Maybe it's a cultural thing.
My mother always taught me that if you went to someone's house, you had a plateful of food to satisfy hunger, but not gluttony. In other words, enjoy what was being served to you but not to the point where you were eating the whole banquet table. Even the parties that my aunties or uncles used to throw when I was younger had people enjoying food throughout the night until only a few dishes remained. People nibbled because food was prepared to be nibbled on. Isn't that what people are supposed to do if there's food set out for you to eat?


But enough of me whining. I'm just glad we didn't make anything else!
Speaking of whining, I decided to use wine for this year's turkey. I was tempted to use the apple-citrus brine from before, but I like the idea of having an ever-changing Thanksgiving turkey each year. So for this one, I decided to go with a white wine brine. I like that it's different from the orange and apple infused flavors that's popular around this time of year and instead uses plain ol' lemon for the citrus.
Another winning thing about the recipe was the fact that it didn't have a bajillion things to make the flavor profile. It was simple and sweet, and almost a no-brainer. :) I changed a few things based on what I had on hand and scaled down the recipe to fit my dinky nine pound turkey. Also, in order to speed up the process, I used ice instead of water courtesy of the automatic ice machine in my fridge (win!).
Oh, and did I mention that this was a pre-brined turkey? I made the mistake of brining one last year and it turned a tad bit salty (like ALMOST too salty). This year, I learned from my mistake and cut the salt called for in half. It still resulted in a slightly salty turkey, but then again, it might be due to the fact that it was sitting in brine for three to four days. It was still edible, but not like last year. As a precaution, I've halved the salt even further in the recipe below . . . just in case.
Despite that fact, this turkey turned out lovely. I paired it with a compound butter that mimicked the flavor profile to boost all the lovely flavors going on in the recipe. It was awesome. It was tasty. And there were so much leftovers for me to play with afterwords! Ha ha, suckers! Stupid guests . . . That's your loss!

White Wine Turkey Brine (for pre-brined turkeys)
(adapted from Bobbi's Kozy Kitchen)
2 cups chicken stock
1/4 cup kosher salt
3 bay leaves
1 tbsp whole black peppercorn
1 1/2 tsp mustard seeds
1 bunch poultry bouquet (sage, rosemary, thyme)
2 cups white wine
1 large onion, thinly sliced
4 cloves garlic, crushed but left in skins
1 large lemon, sliced
1 tbsp white vinegar
4 to 5 cups ice
8.5 to 9 lbs turkey, giblets and neck removed
Bring the stock, salt, bay leaves, peppercorns, mustard seeds, and poultry bouquet to boil. Stir until salt is dissolved. Remove from heat. Pour in the wine, then add the onion, garlic, lemon, and vinegar. Stir in enough ice to cool mixture.


Place turkey in a large enough container to allow for bird to be fully submerged. Ladle some of the brine into container. Slowly lower in the turkey and continue to add brine until turkey is covered, making sure to stuff the cavity with a handful of herbs, onion, and lemon.
Close container and refrigerate for at least 24 hours up to 3 days. Remove turkey from the brine the night before cooking, pat dry, and place on a baking sheet in the refrigerator uncovered overnight. Bring turkey to room temperature before using a compound butter for roasting, about 1 to 1 1/2 hours.

Herbed Compound Butter with Lemon and Garlic
(makes enough for a 10.lbs turkey)
1/2 cup unsalted butter, room temperature
1 large sprig sage
1 sprig rosemary
1 sprig thyme
2 cloves garlic, minced
1/4 tsp onion powder
zest of half a lemon
pinch of kosher salt
pinch of fresh ground pepper
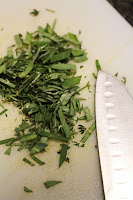
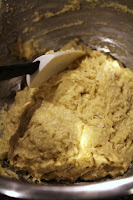
Rough chop sage and mince together rosemary and thyme. Add to butter. Add garlic, onion powder, zest, salt, and pepper. Mix until well combined then refrigerate for at least overnight before use. Bring to room temperature before applying to turkey.


To use compound butter:
When compound butter is at room temperature, position turkey on roasting rack. Carefully separate the skin from the breasts of the turkey. Spread butter over breast meat under skin until a thin layer forms. Slather additional butter onto the remaining areas of the turkey, as well as the inside cavity. Discard any leftover butter.
Loosely place some celery, carrot, and onion in the cavity of the turkey. Roast at 475F degrees for the first 30 minutes then at 325F for the remainder of the cooking time (fyi: an almost 9.lbs turkey takes around 3 hours to cook at this temperature). If skin starts to brown too quickly, cover problem areas with foil to prevent burning.
Cook to 155F degrees then let rest for at least 30 minutes. Bird will continue to cook and should reach a safe internal temperature of 165F degrees.


